GitLab
Table of Contents
Getting started
To integrate with Ghost Inspector, you will need to set up a few custom variables in the GitLab UI:
SUITE_ID- available from your suite (Settings > Details > Suite ID).GHOST_INSPECTOR_API_KEY- available from your account (User Settings > Details > API Access).NGROK_TOKEN- (optional) if you would like to execute against an application running in your build you will also need this token from your ngrok dashboard.
This will allow you to mask the values in the logs and restrict them to protected branches.
GitLab CI/CD Integration (with .gitlab-ci.yml)
Test against public URL
If your GitLab CI/CD deploys to a publicly available URL, the simplest way to integrate Ghost Inspector is to use our CLI to execute a test or a suite. This example will use our CLI convenience Docker image to execute a suite:
# .gitlab-ci.yml
image:
name: ghostinspector/cli
# we must override the entrypoint for the script to work
entrypoint: ['']
stages:
- test
ghost-inspector-suite:
stage: test
script:
- |
ghost-inspector suite execute $SUITE_ID \
--apiKey $GHOST_INSPECTOR_API_KEY \
--startUrl $START_URL \
--region ap-northeast-2 \
--errorOnFail
You will need to replace $START_URL with the public URL. Note that this example also uses --region to specify a different geolocation as well as --errorOnFail which will instruct the process to use a non-zero exit code if the suite returns with a failing status. See our CLI documentation for more execution options.
Testing a local application (Generic)
The following example uses a generic Linux environment to build and test a local application:
# .gitlab-ci.yml
image:
  name: ubuntu

stages:
  - test

ghost-inspector-suite:
  stage: test
  script:
    # Download the latest ghost-inspector CLI release for Linux
    - apt-get update -y && apt-get install -y curl
    - curl -sL https://github.com/ghost-inspector/node-ghost-inspector/releases/latest/download/ghost-inspector-linux --output ./ghost-inspector
    - chmod +x ./ghost-inspector
    # Start the local application
    - /path/to/my-application-entrypoint --port 8000 &
    # Execute the suite
    - >
      ./ghost-inspector suite execute $SUITE_ID \
        --apiKey $GHOST_INSPECTOR_API_KEY \
        --ngrokTunnel localhost:8000 \
        --ngrokUrlVariable startUrl \
        --ngrokToken $NGROK_TOKEN \
        --errorOnFail
The example above downloads the CLI standalone binary, starts a local application on port 8000 and then executes a Ghost Inspector suite against it while creating a temporary VPN tunnel with --ngrokTunnel. The additional parameter --ngrokUrlVariable sets the URL of the tunnel to the variable startUrl (otherwise ngrokUrl by default). Finally --errorOnFail makes sure a failing suite status will fail the build.
Visit our CLI documentation for more execution options.
GitLab webhook config
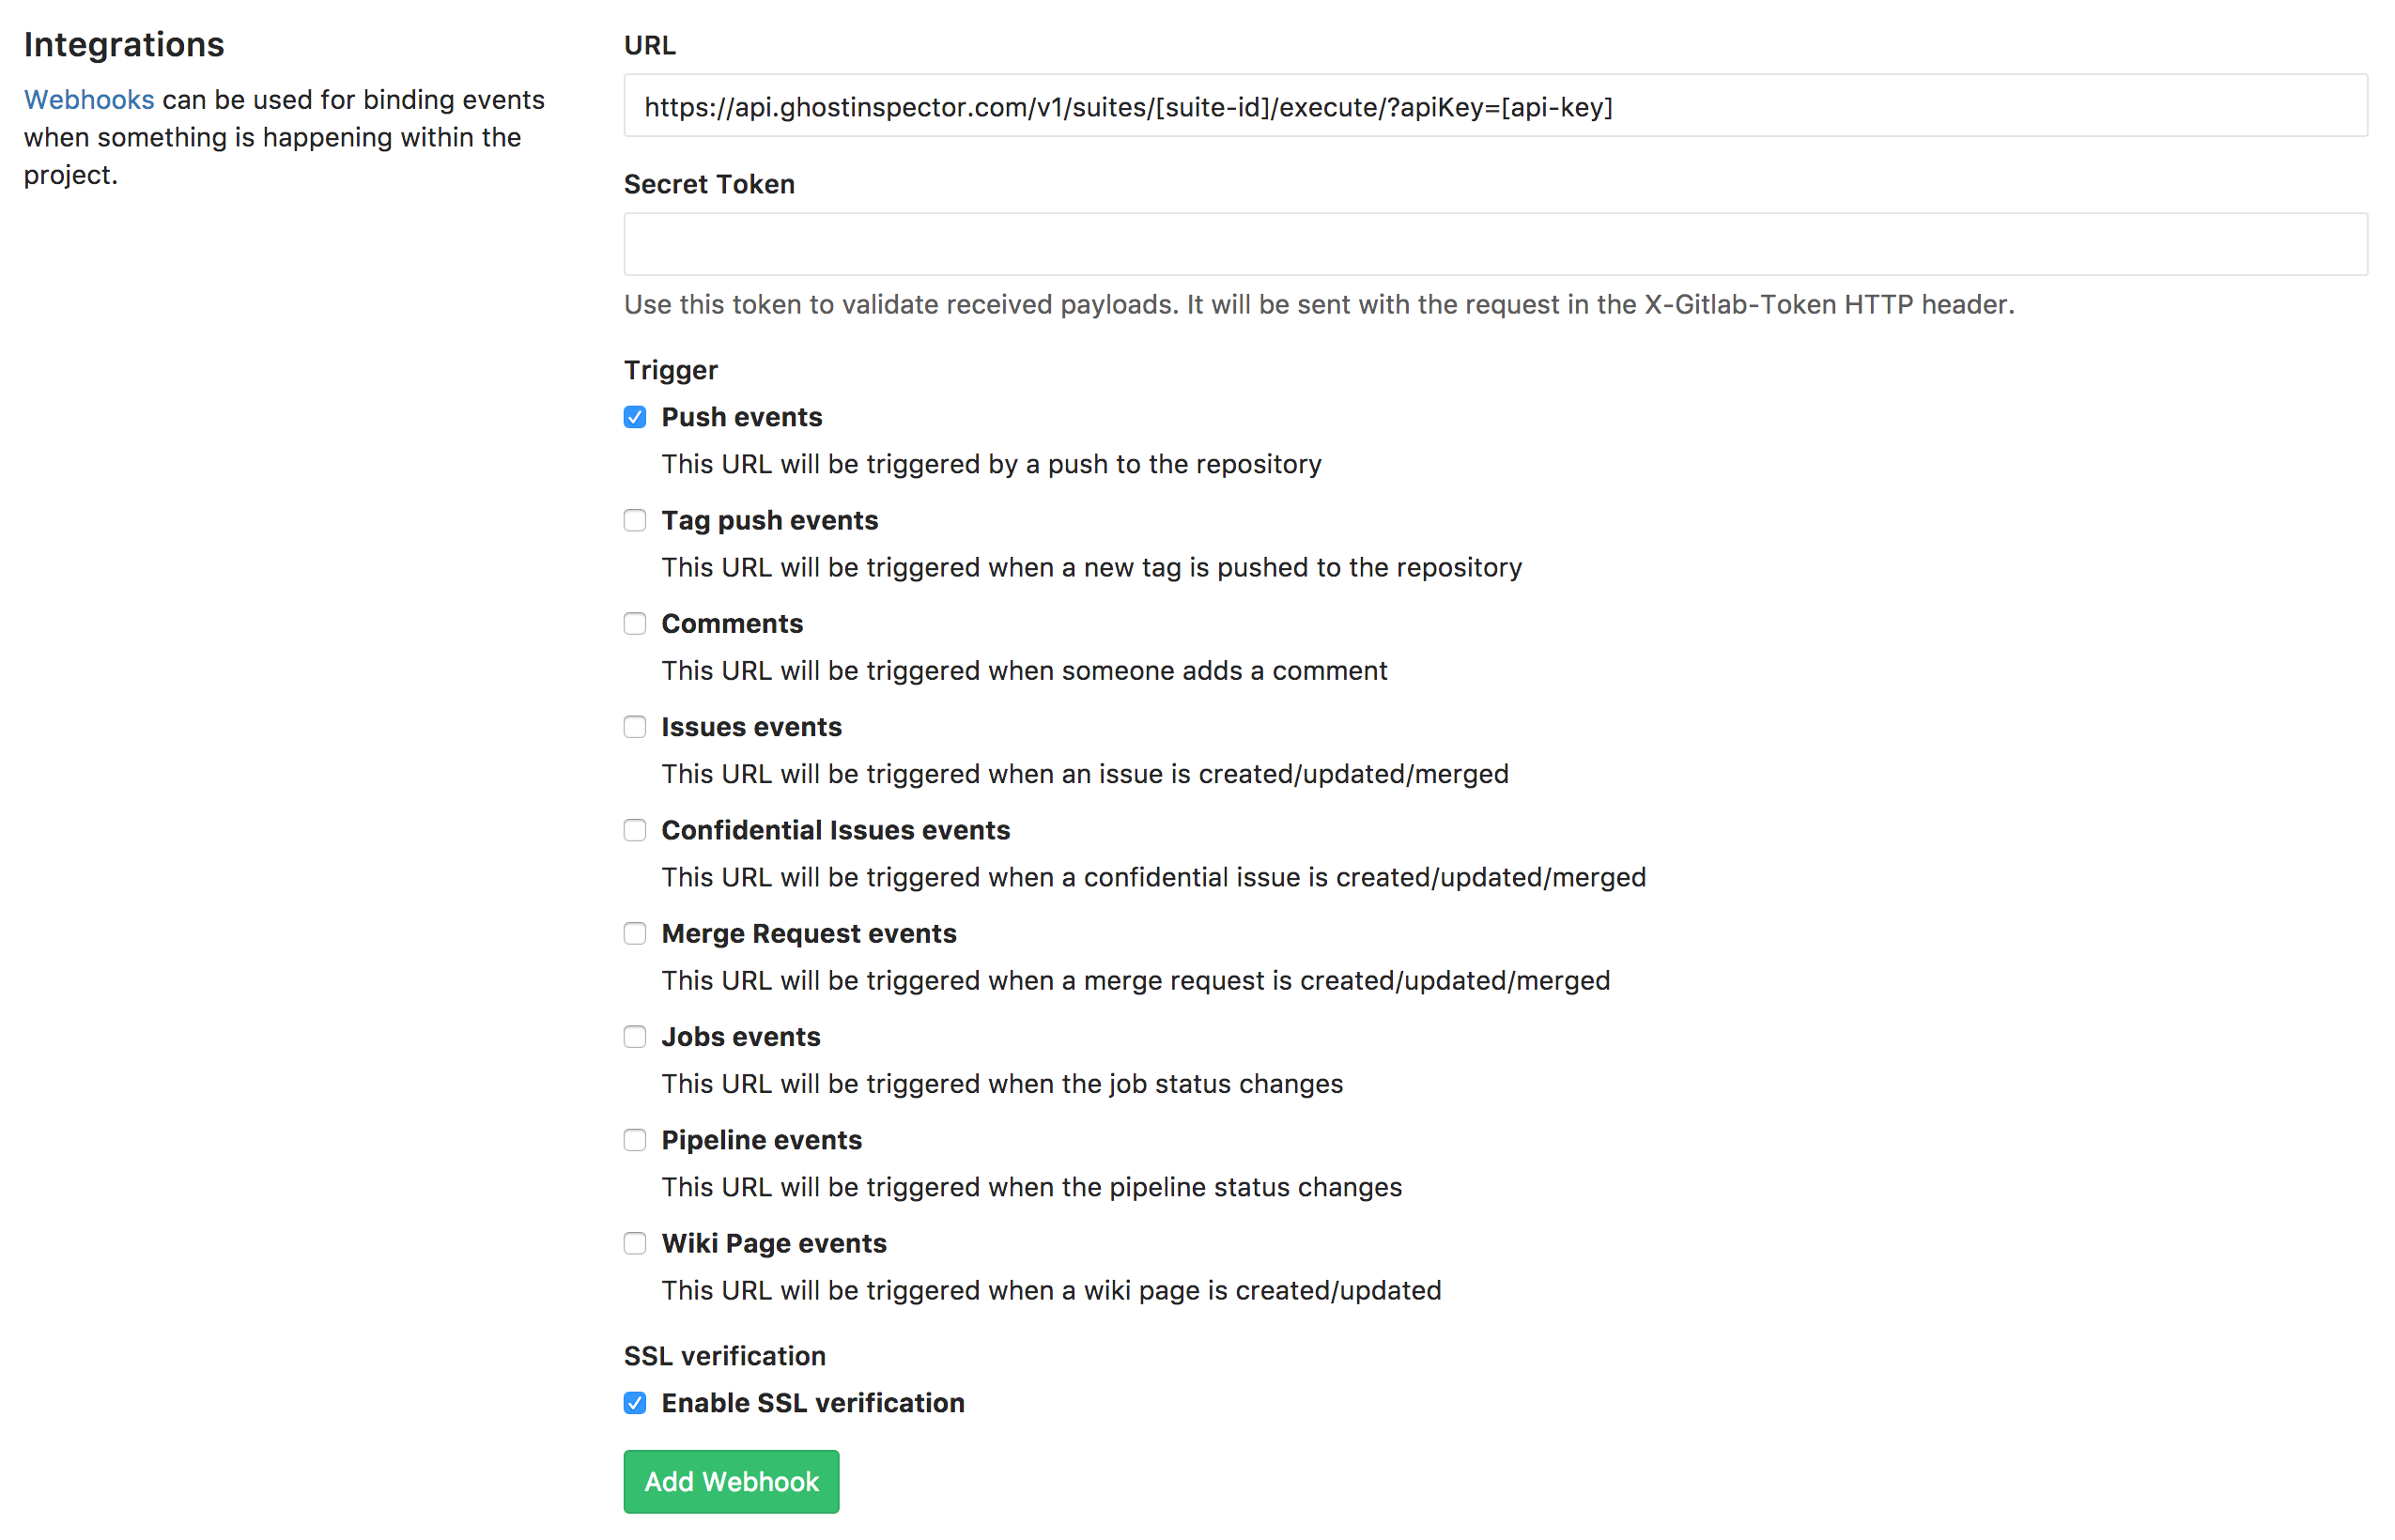
You can also trigger Ghost Inspector tests using GitLab’s webhooks feature. Simply add a webhook pointing to our API and select when you would like it to be fired.
To trigger a suite, the API URL would look like this:
https://api.ghostinspector.com/v1/suites/[suite-id]/execute/?apiKey=[api-key]&immediate=1Don't forget to swap in your own values for [suite-id] and [api-key].
