Jira Cloud
Table of Contents
Getting started
Ghost Inspector provides an official plugin for Jira that will allow you to create and update issues within Jira for test executions within Ghost Inspector.
Installing the Ghost Inspector plugin
To install the plugin, go to your Jira workspace and navigate to Settings > Apps. Under Find new apps search for "Ghost Inspector":
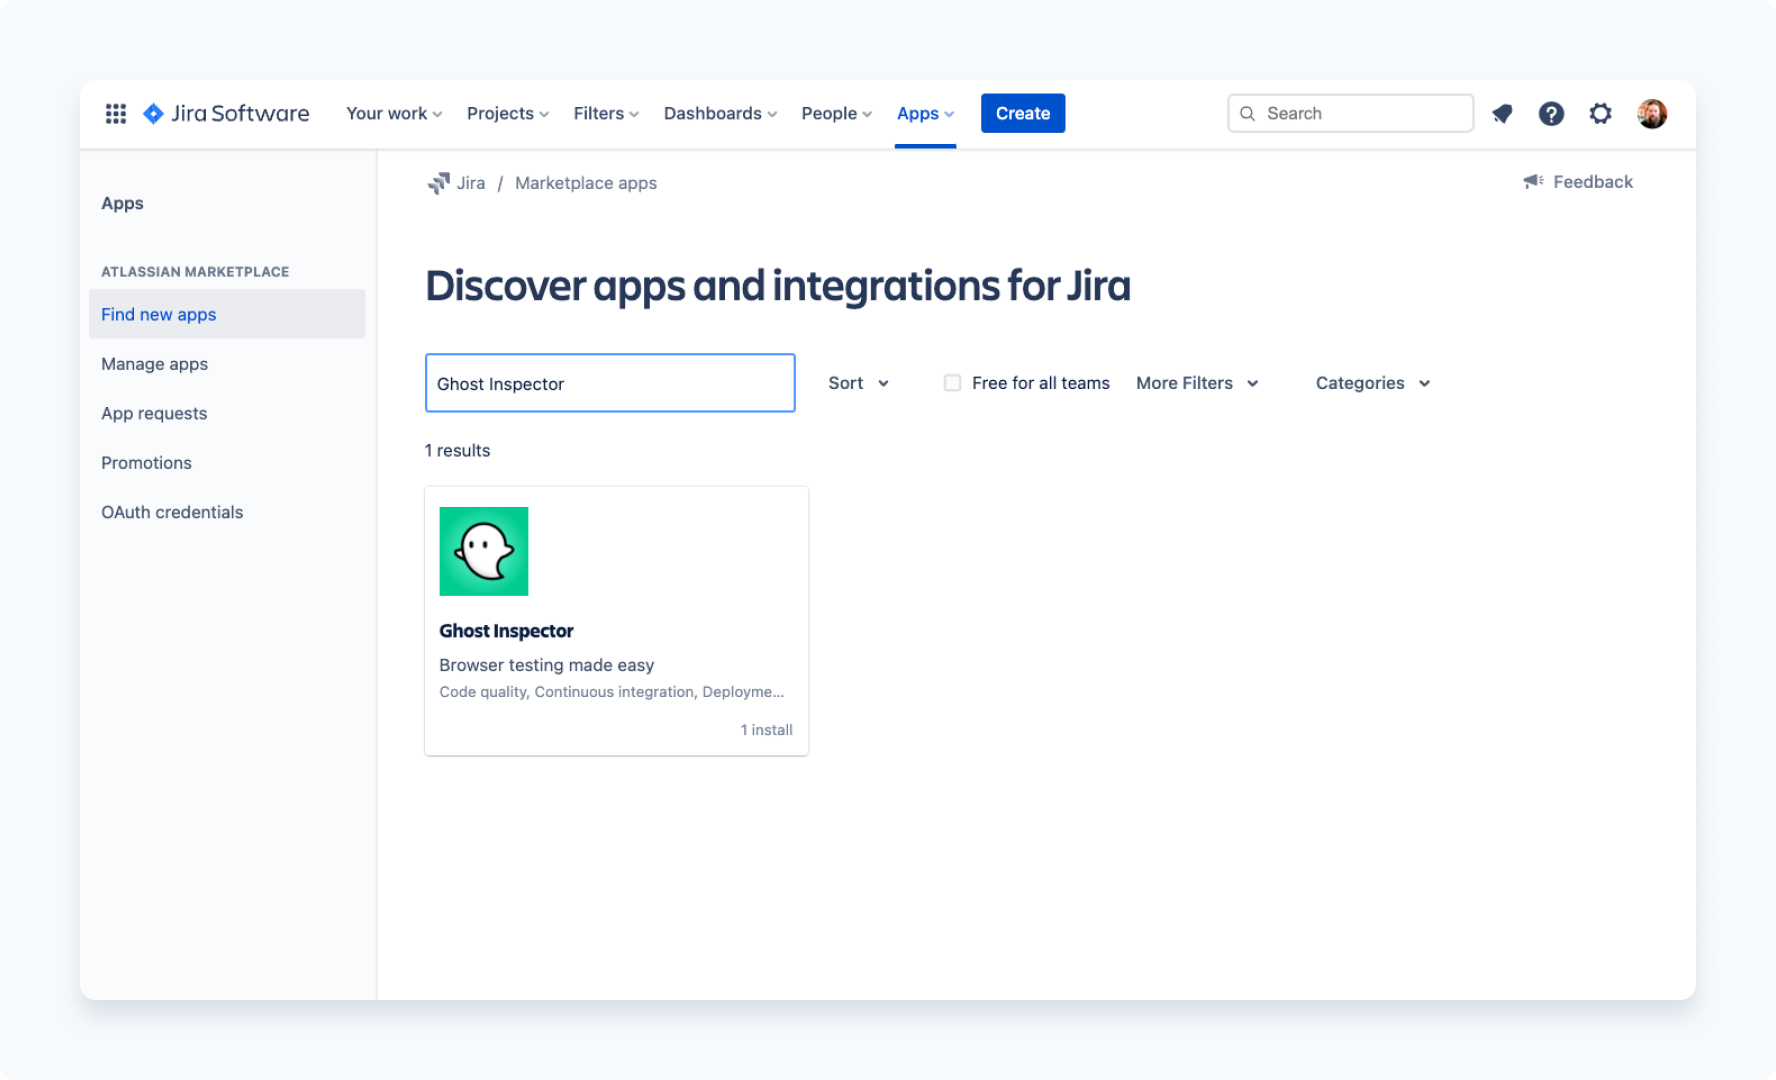
Click on the Ghost Inspector plugin and then select Get app and then Get it now.
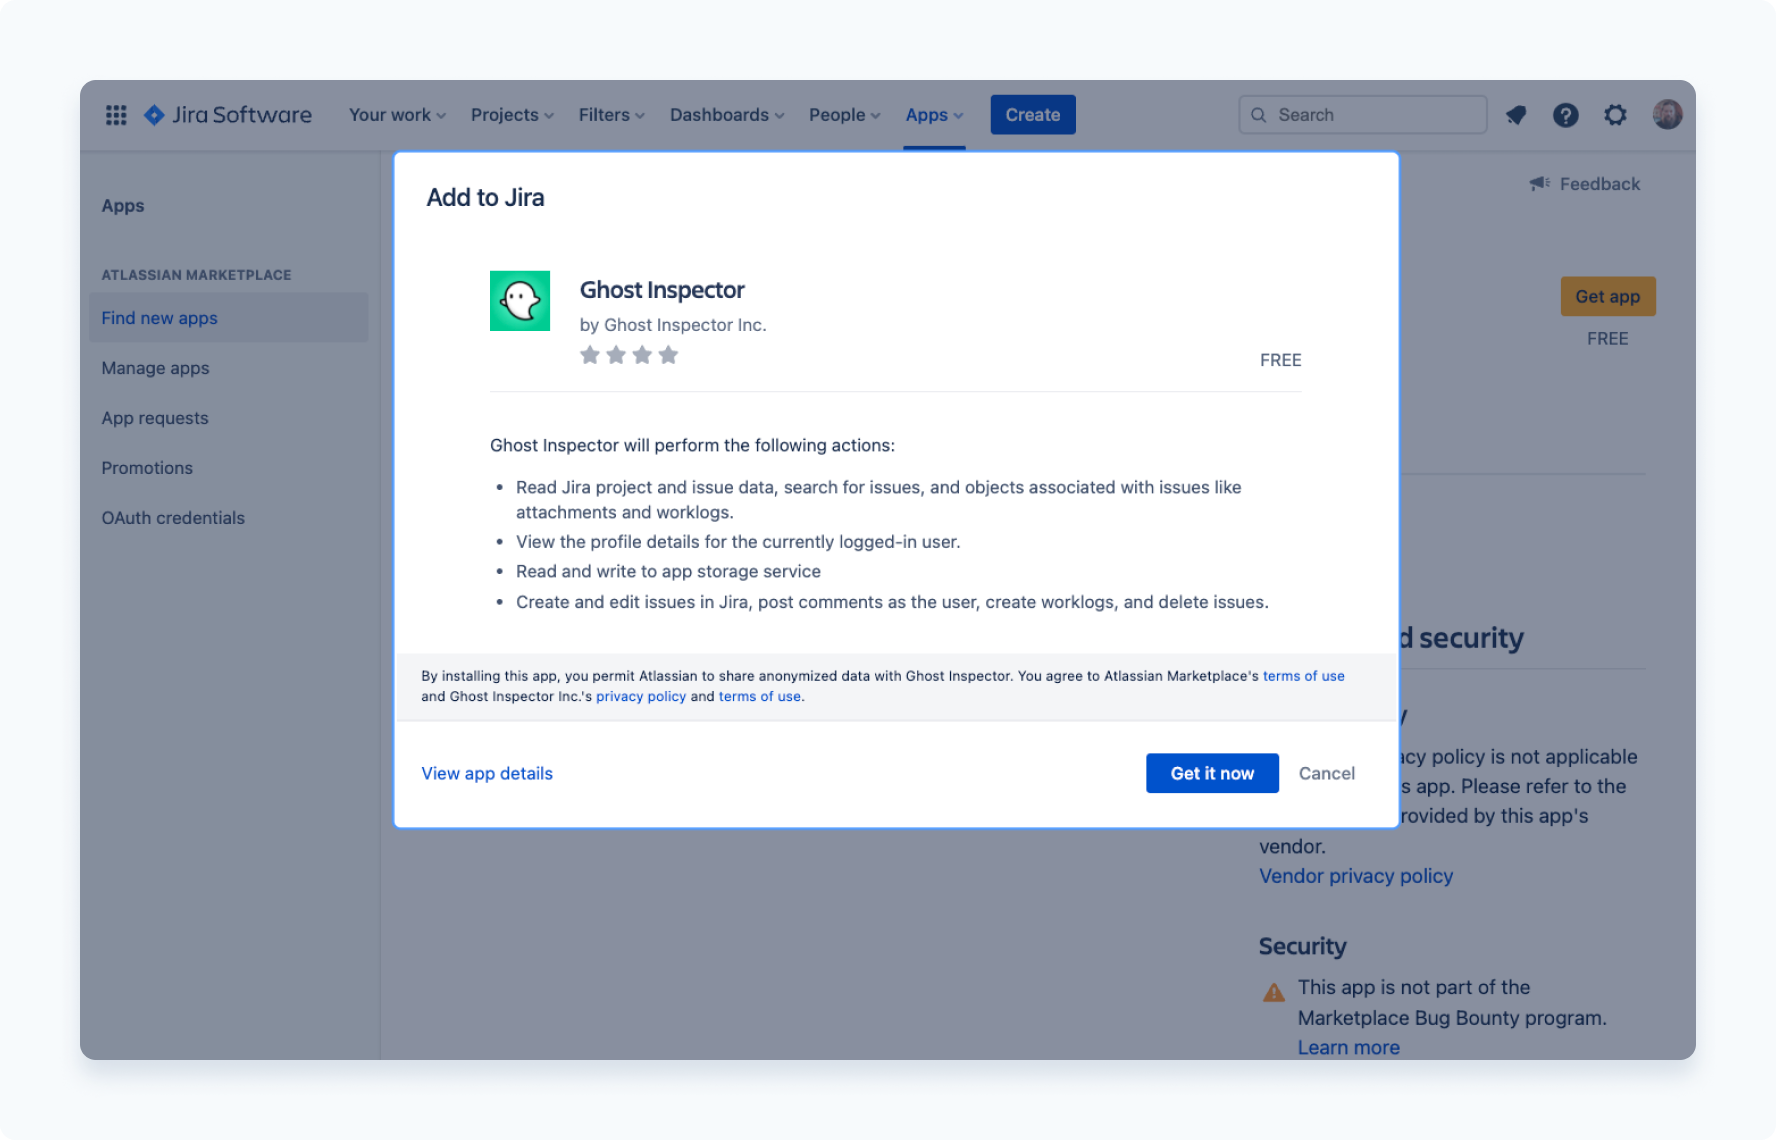
Plugin configuration
Allowing access
The Ghost Inspector plugin configuration will now be accessible under the left side of the Settings > Apps screen. Clicking on Ghost Inspector the first time will prompt you to give the app permission to your installation:
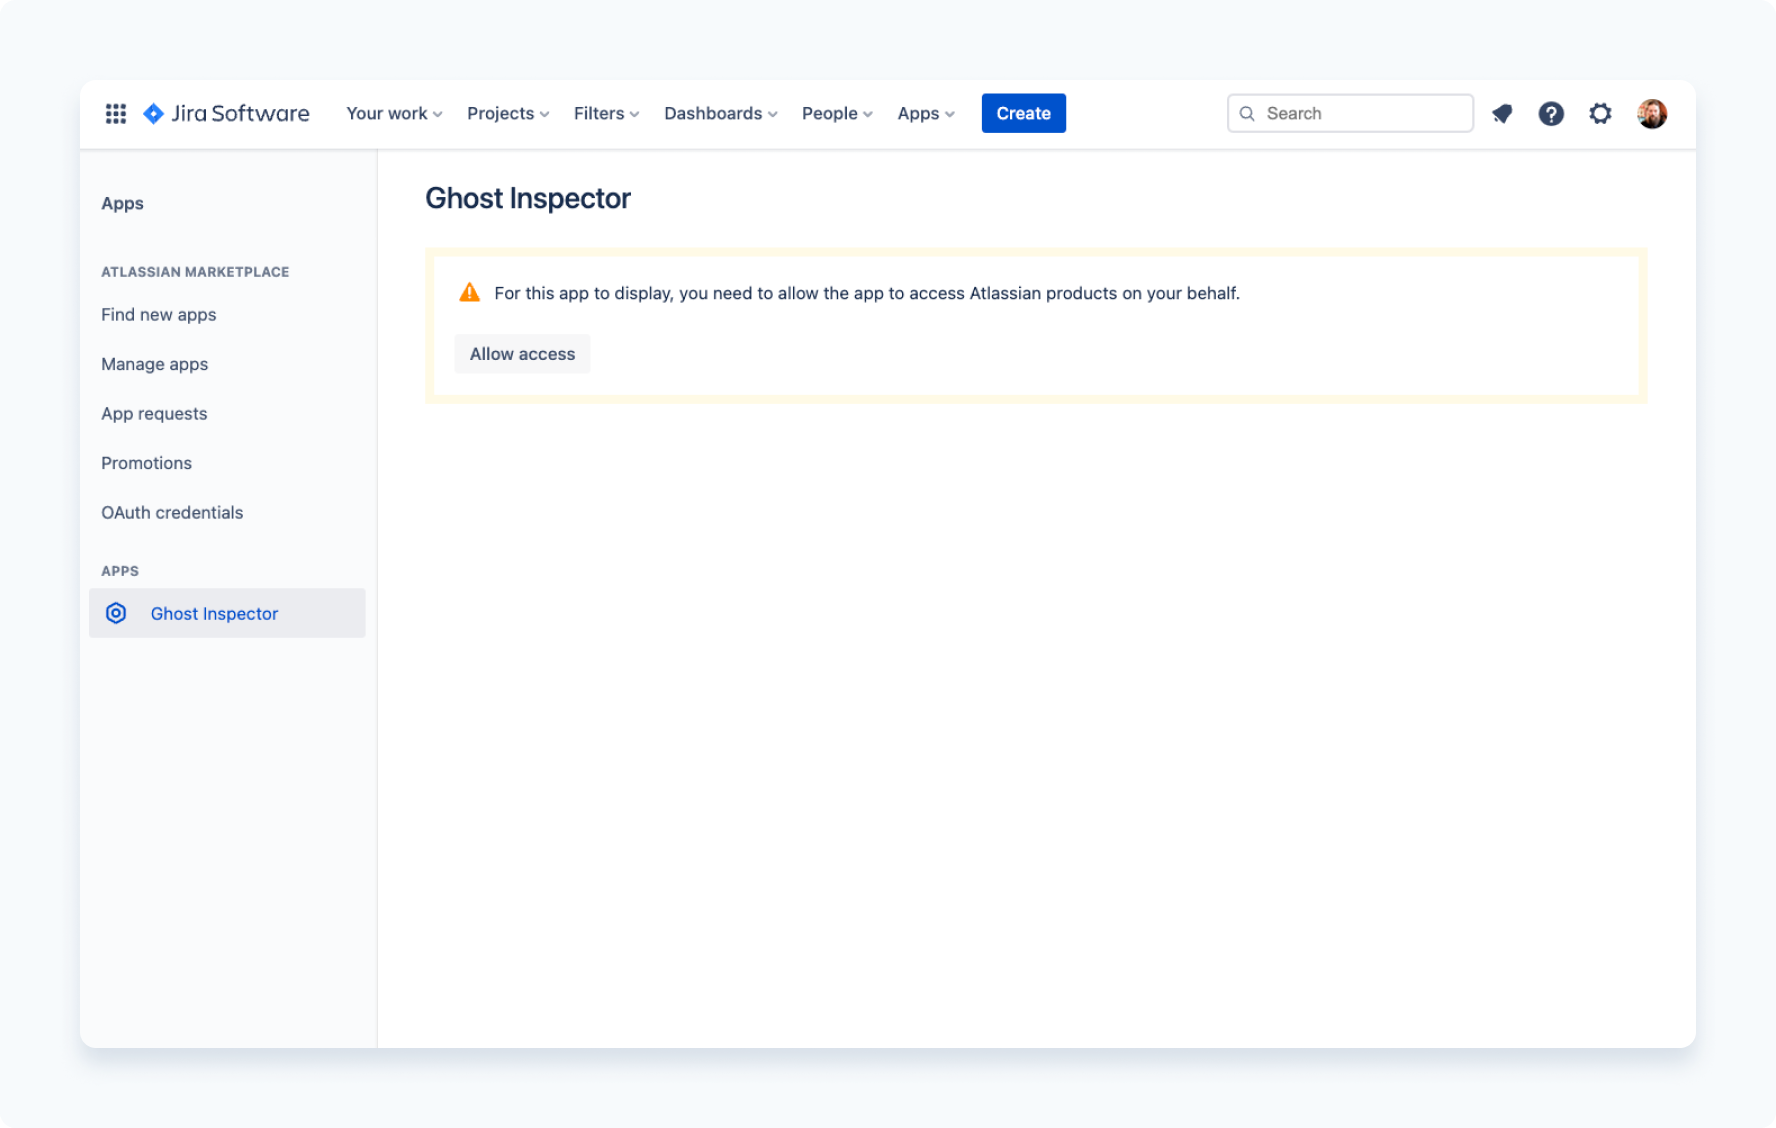
Click on Allow access and then review the permissions that the Ghost Inspector plugin requires. Click Accept once you are satisfied with the permissions:
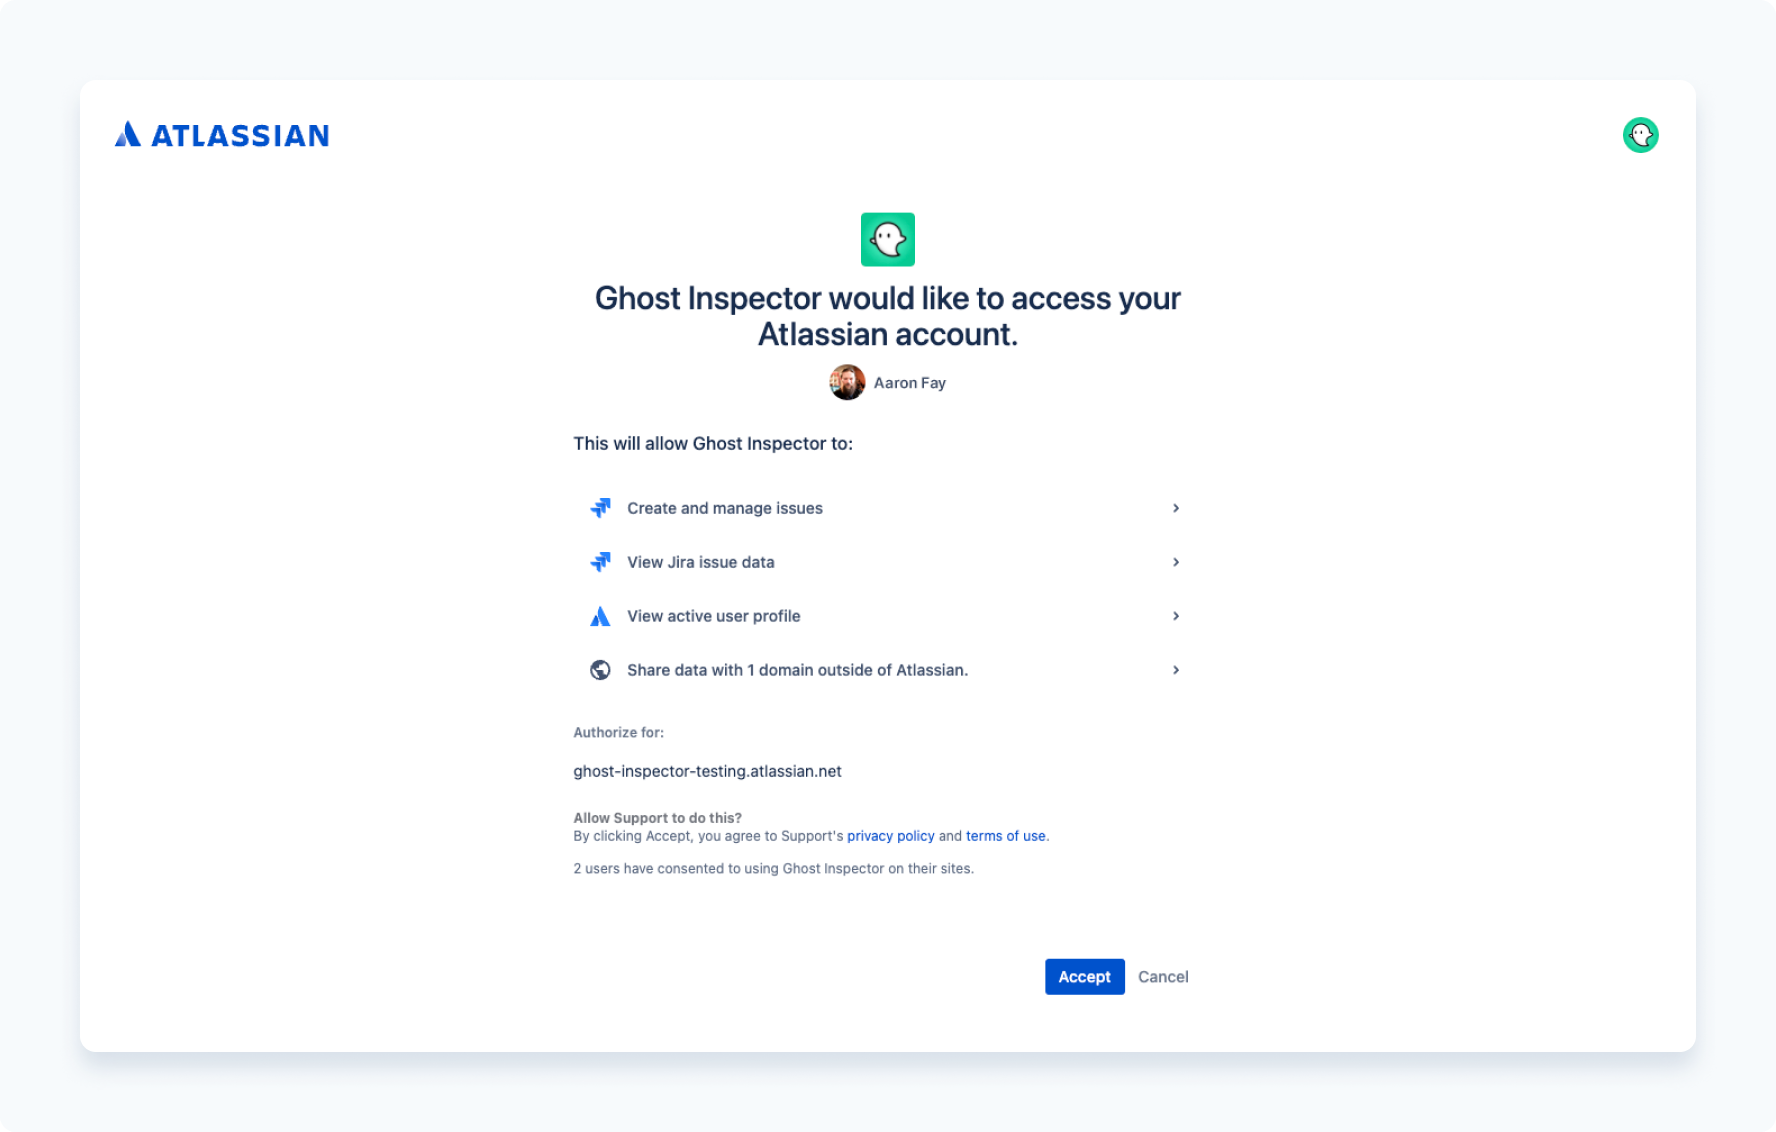
With that completed, you can now configure the plugin.
API Key configuration
With your Ghost Inspector API key, you will be able to execute tests and view test results directly within your Jira issues. Your Ghost Inspector API key can be found in your account settings.
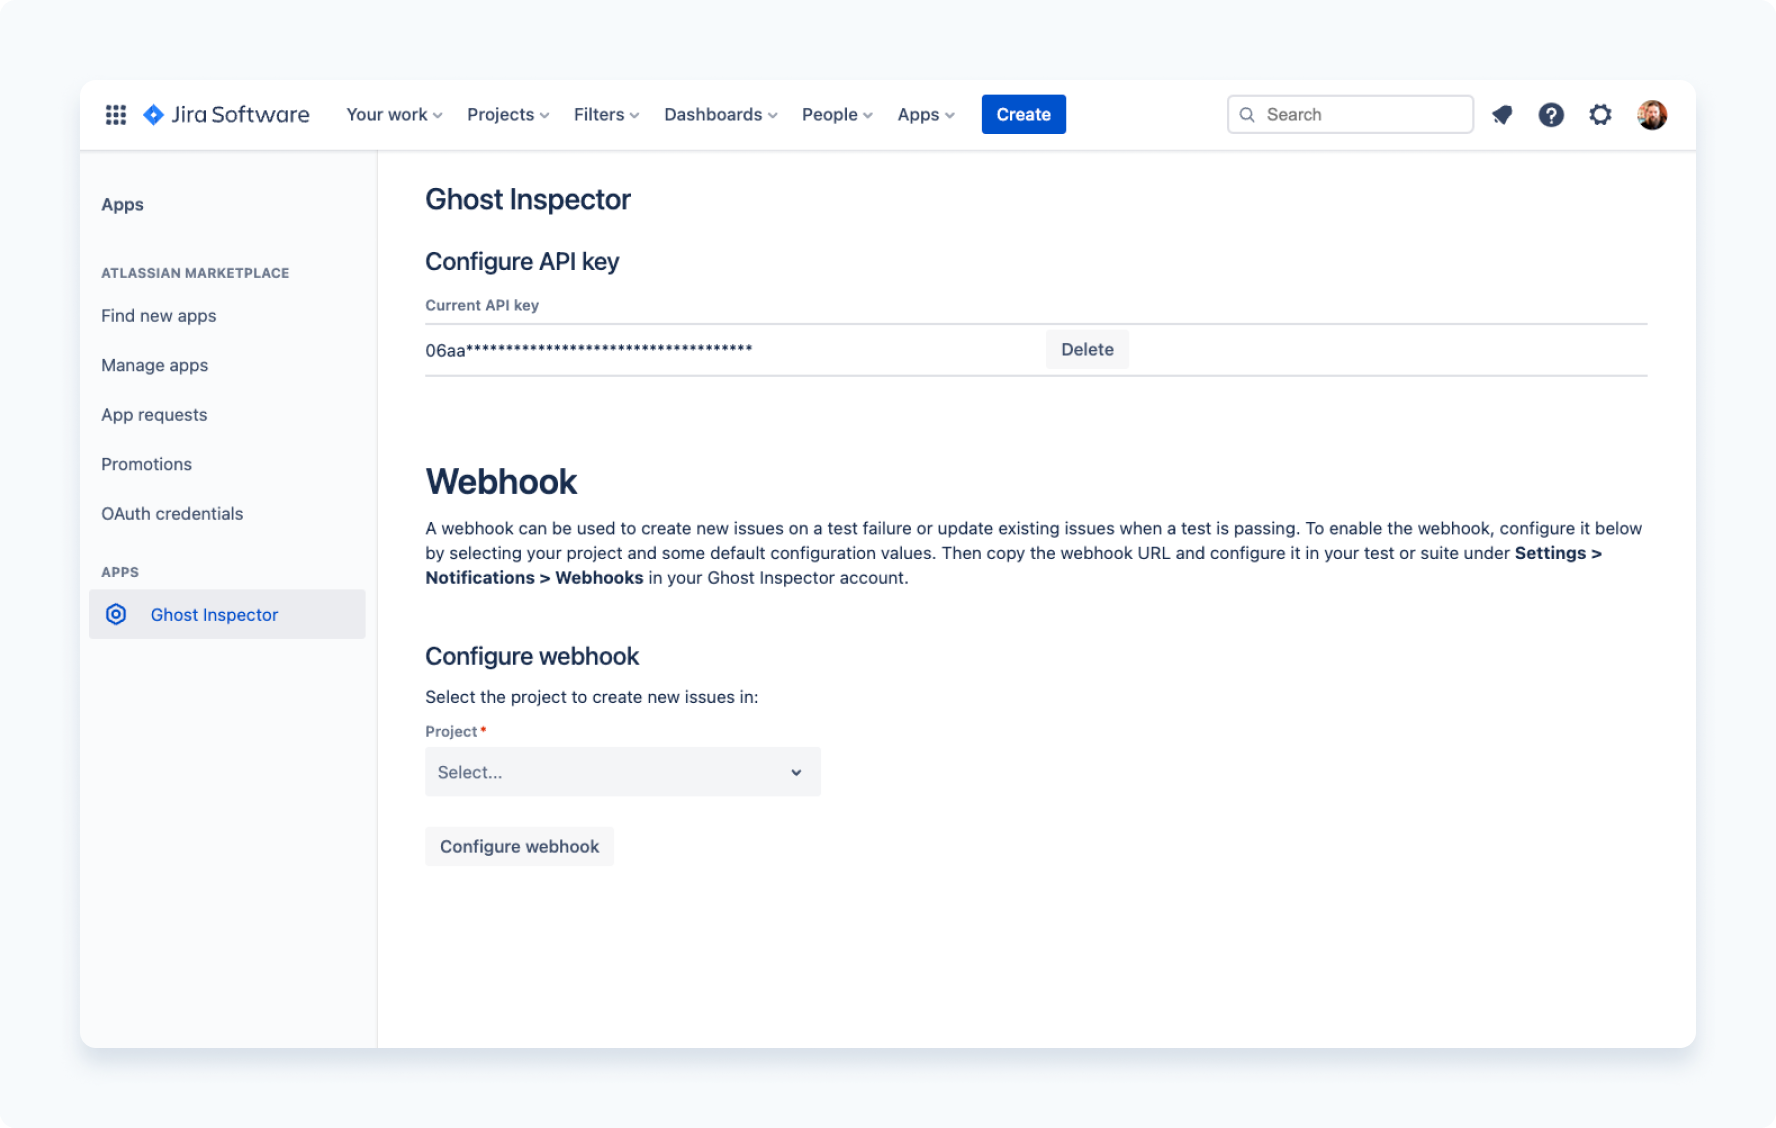
Click Save to save your API key.
Configure new webhook
New issues can be created within your Jira project when your Ghost Inspector test fails. This is accomplished by using a webhook that you can configure within the Jira plugin. To create the webhook, select your project and click Configure webhook.
A new dialog will appear requiring you to complete a number of drop-downs:
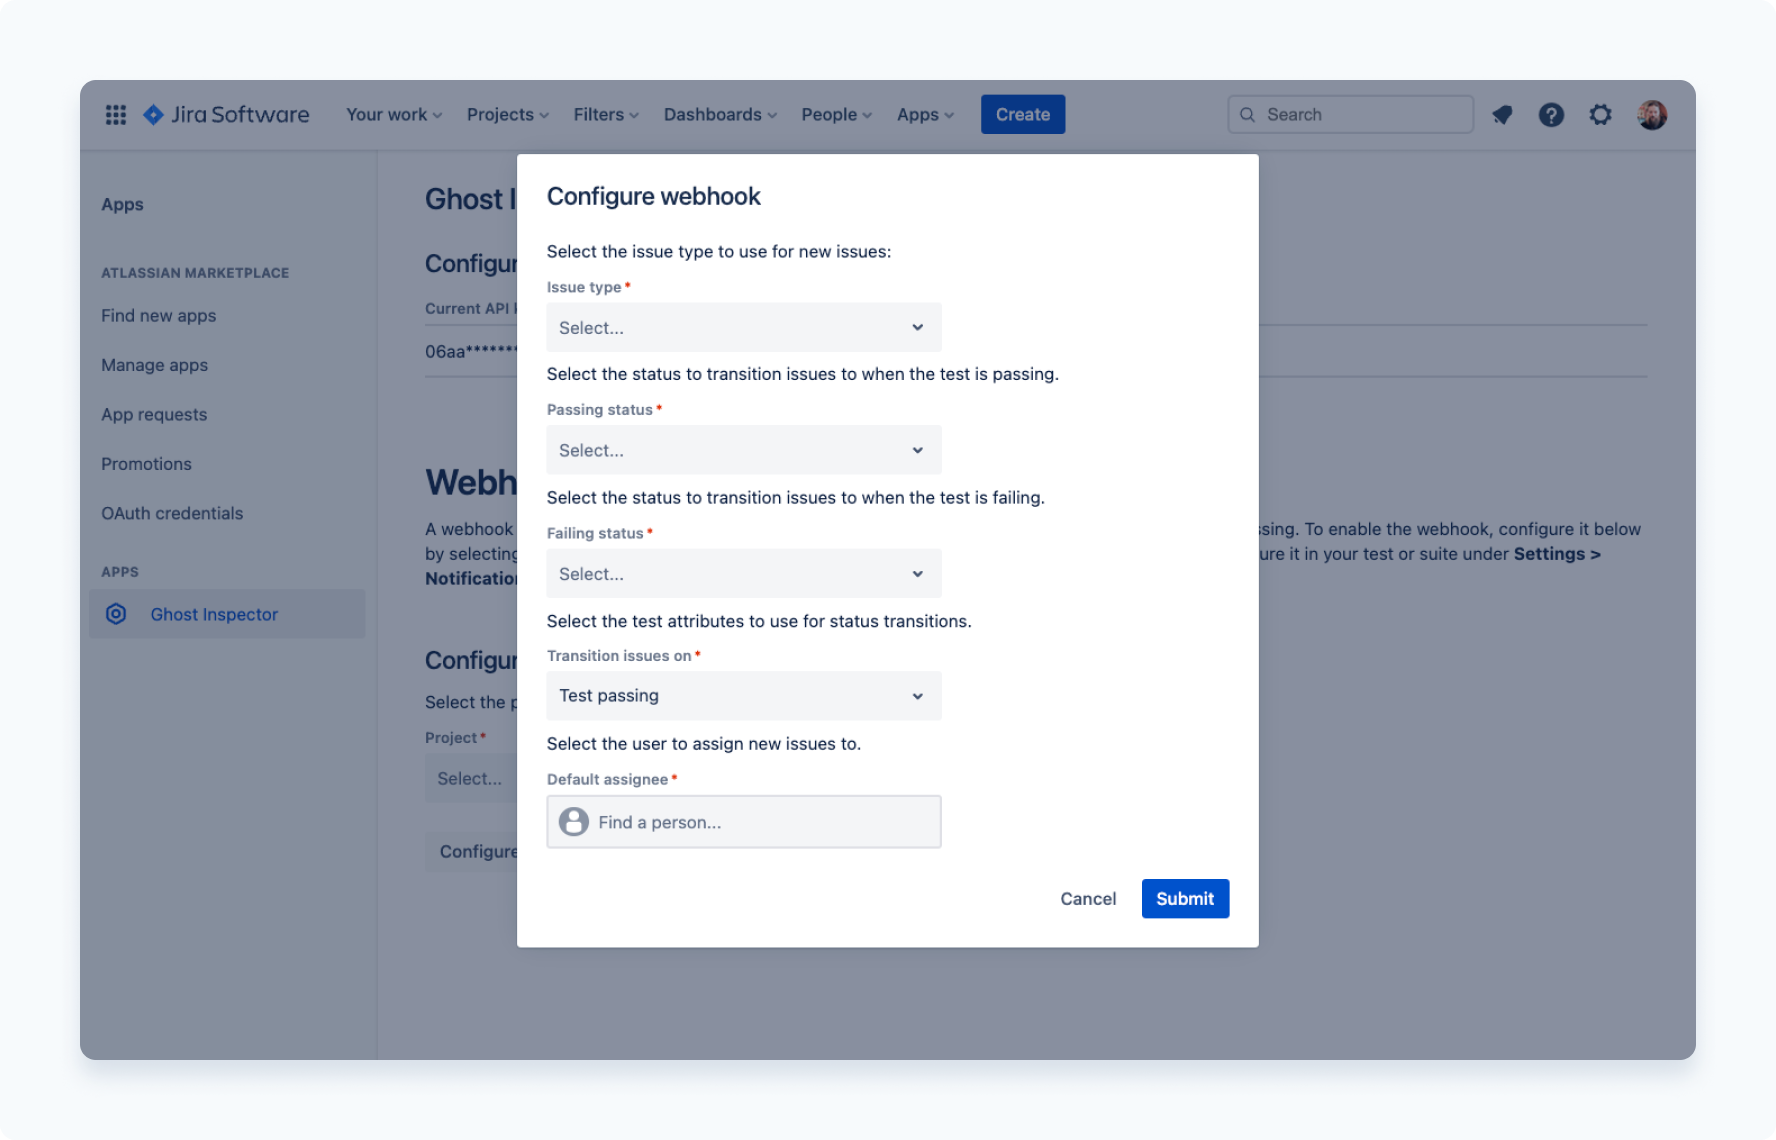
Here's a breakdown of the selection items:
- Issue type - this is the type of Jira issue that will be created when your test fails.
- Passing status - this is the status to transition your Jira issue to when a test passes.
- Failing status - this is the status to transition your Jira issue to when a test fails.
- Transition on - gives you the option to trigger the issue transition on test failure, screenshot failure or both.
- Assignee - select a user that newly-created issues will be assigned to by default.
With those values selected, click Create webhook.
Add webhook to test settings
Once the webhook is created, a new URL will be provided along with a table showing the current configuration for the webhook.
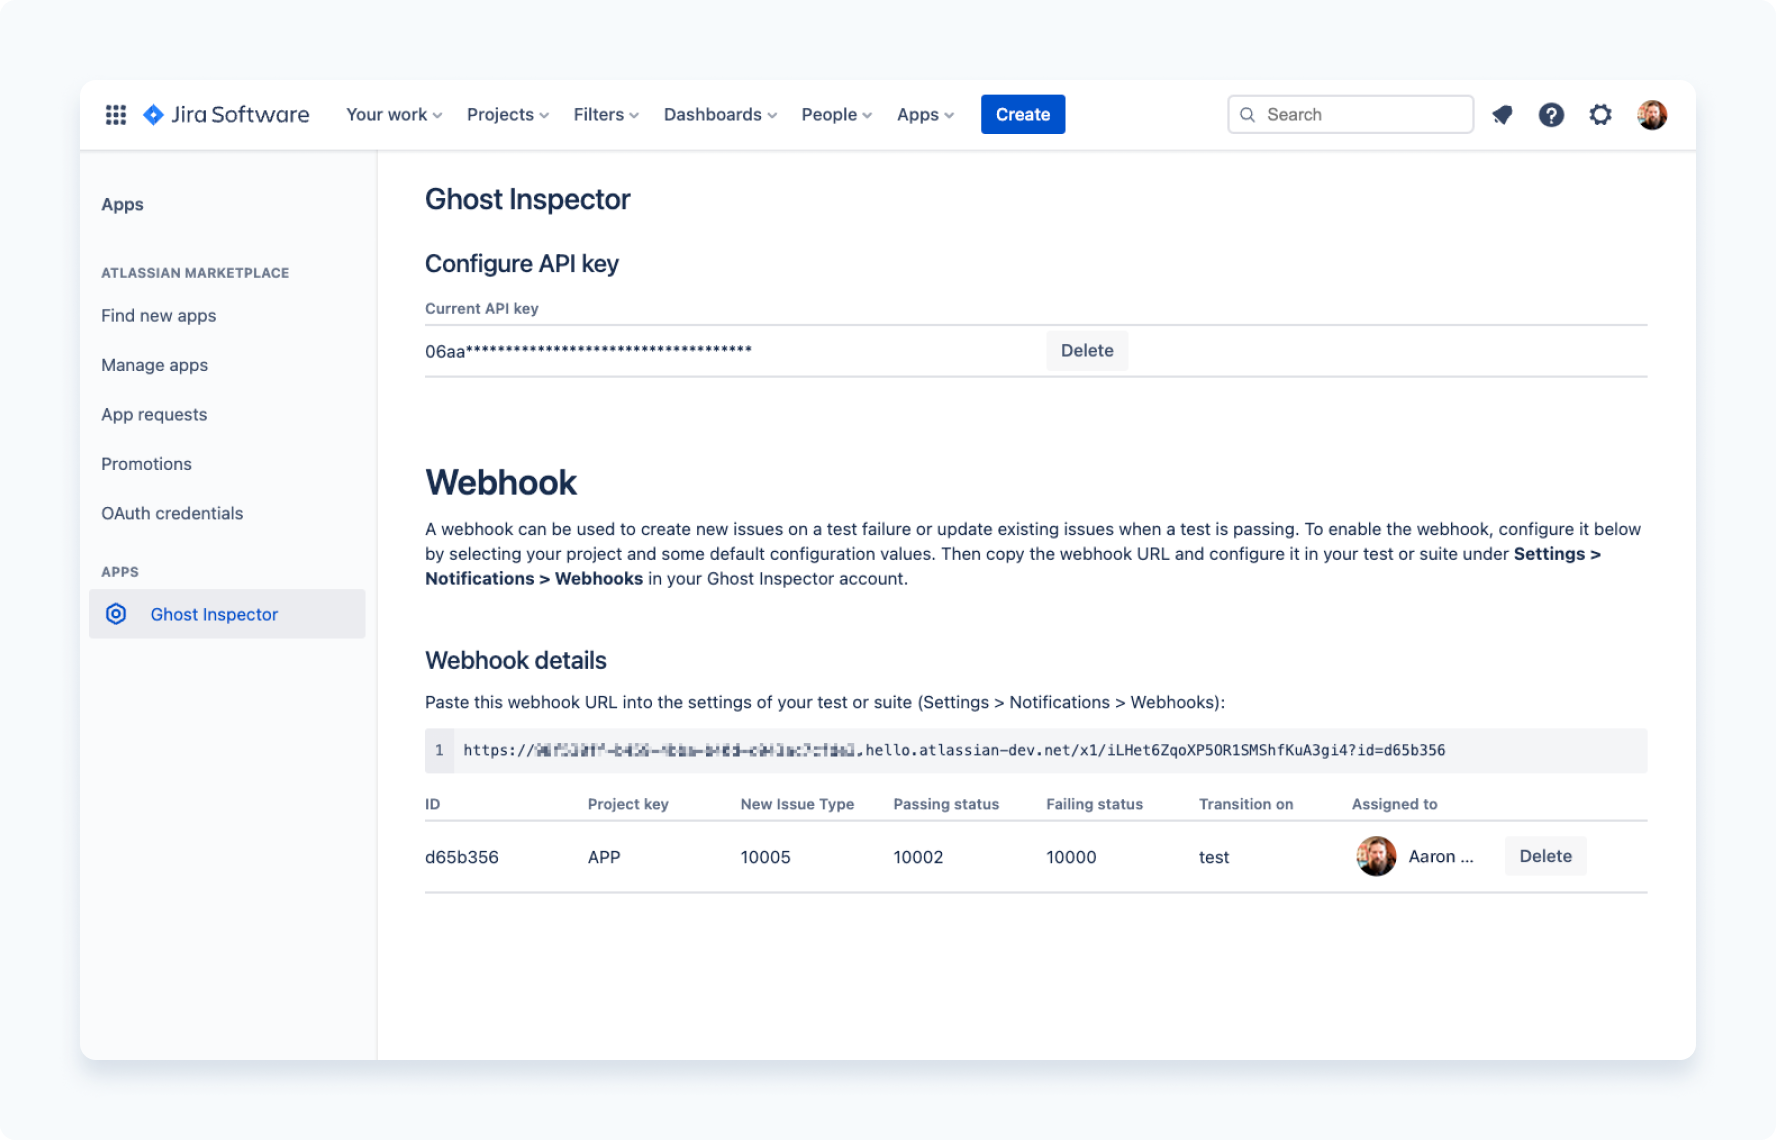
Copy the webhook URL and navigate to your desired test. Go to Settings > Notifications > Webhooks, change the setting to Yes and click + Add webhook. Paste in the new URL and change the frequency to Always send.
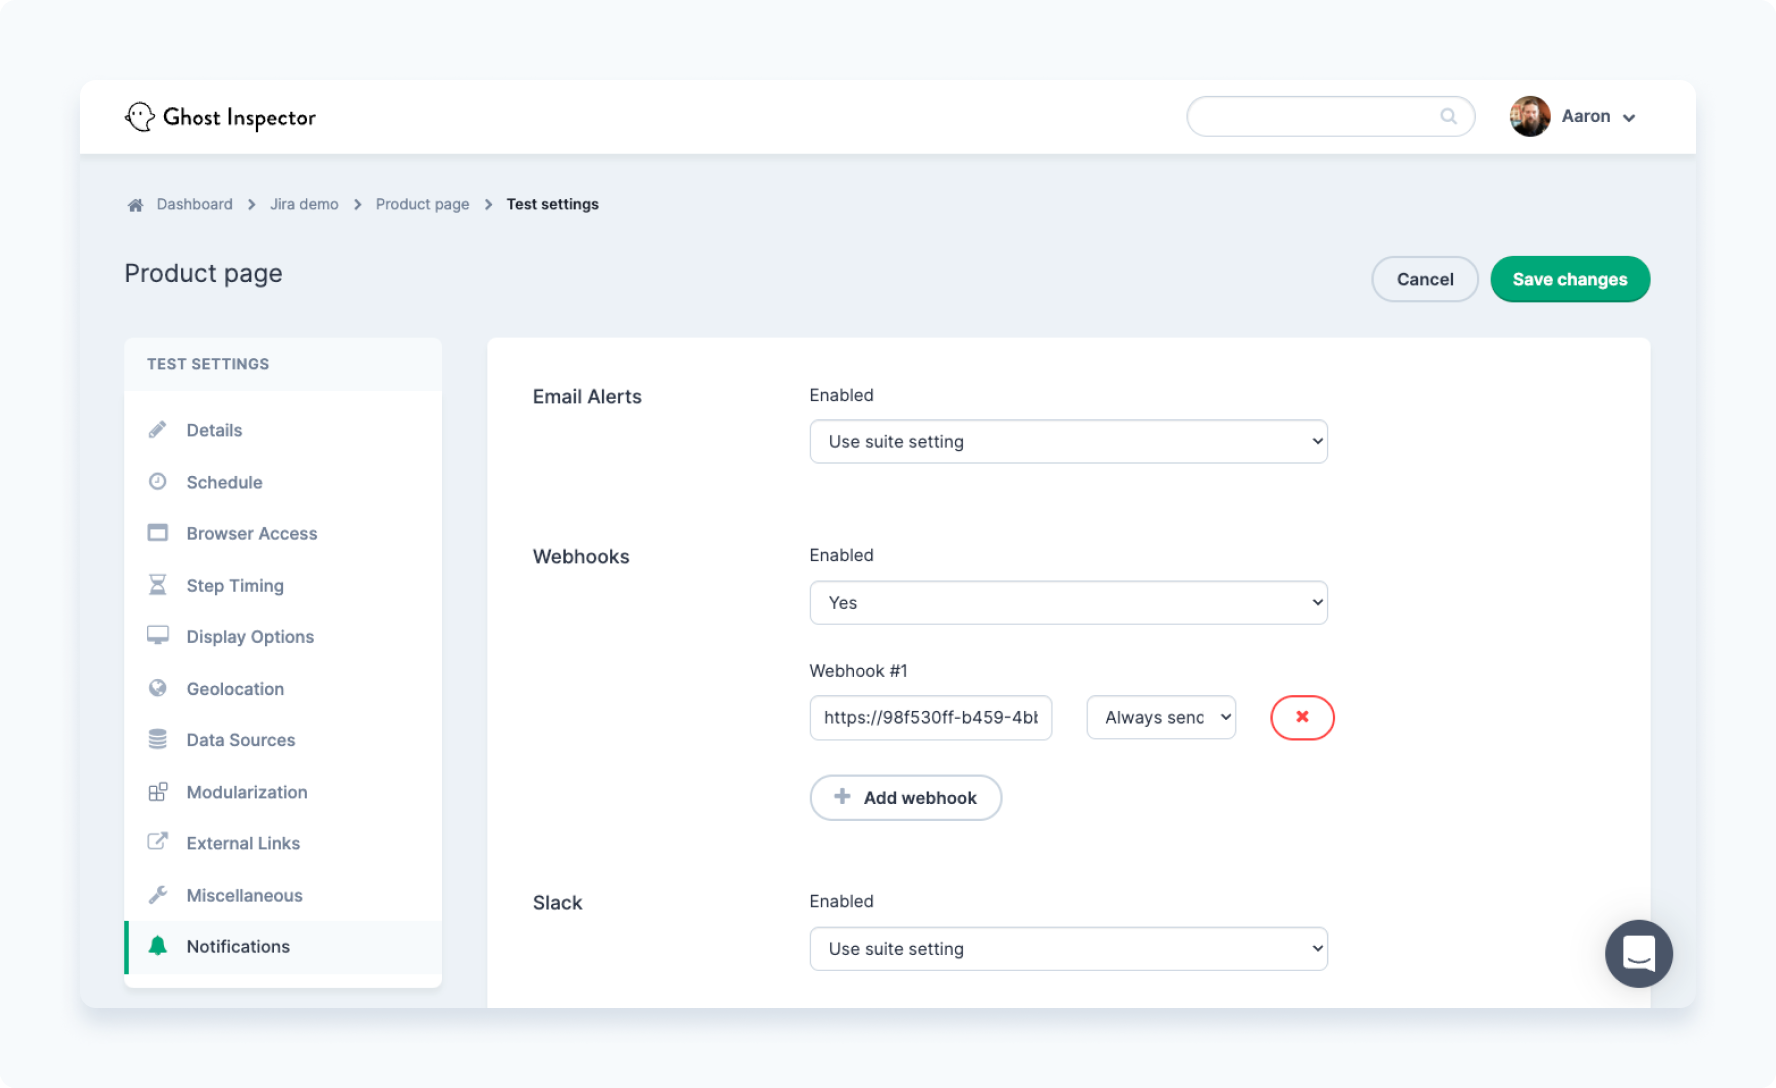
Now click Save changes to return to your test. The next time your test is executed and fails, a new issue will be created in Jira using the webhook settings specified.
Jira issues panel
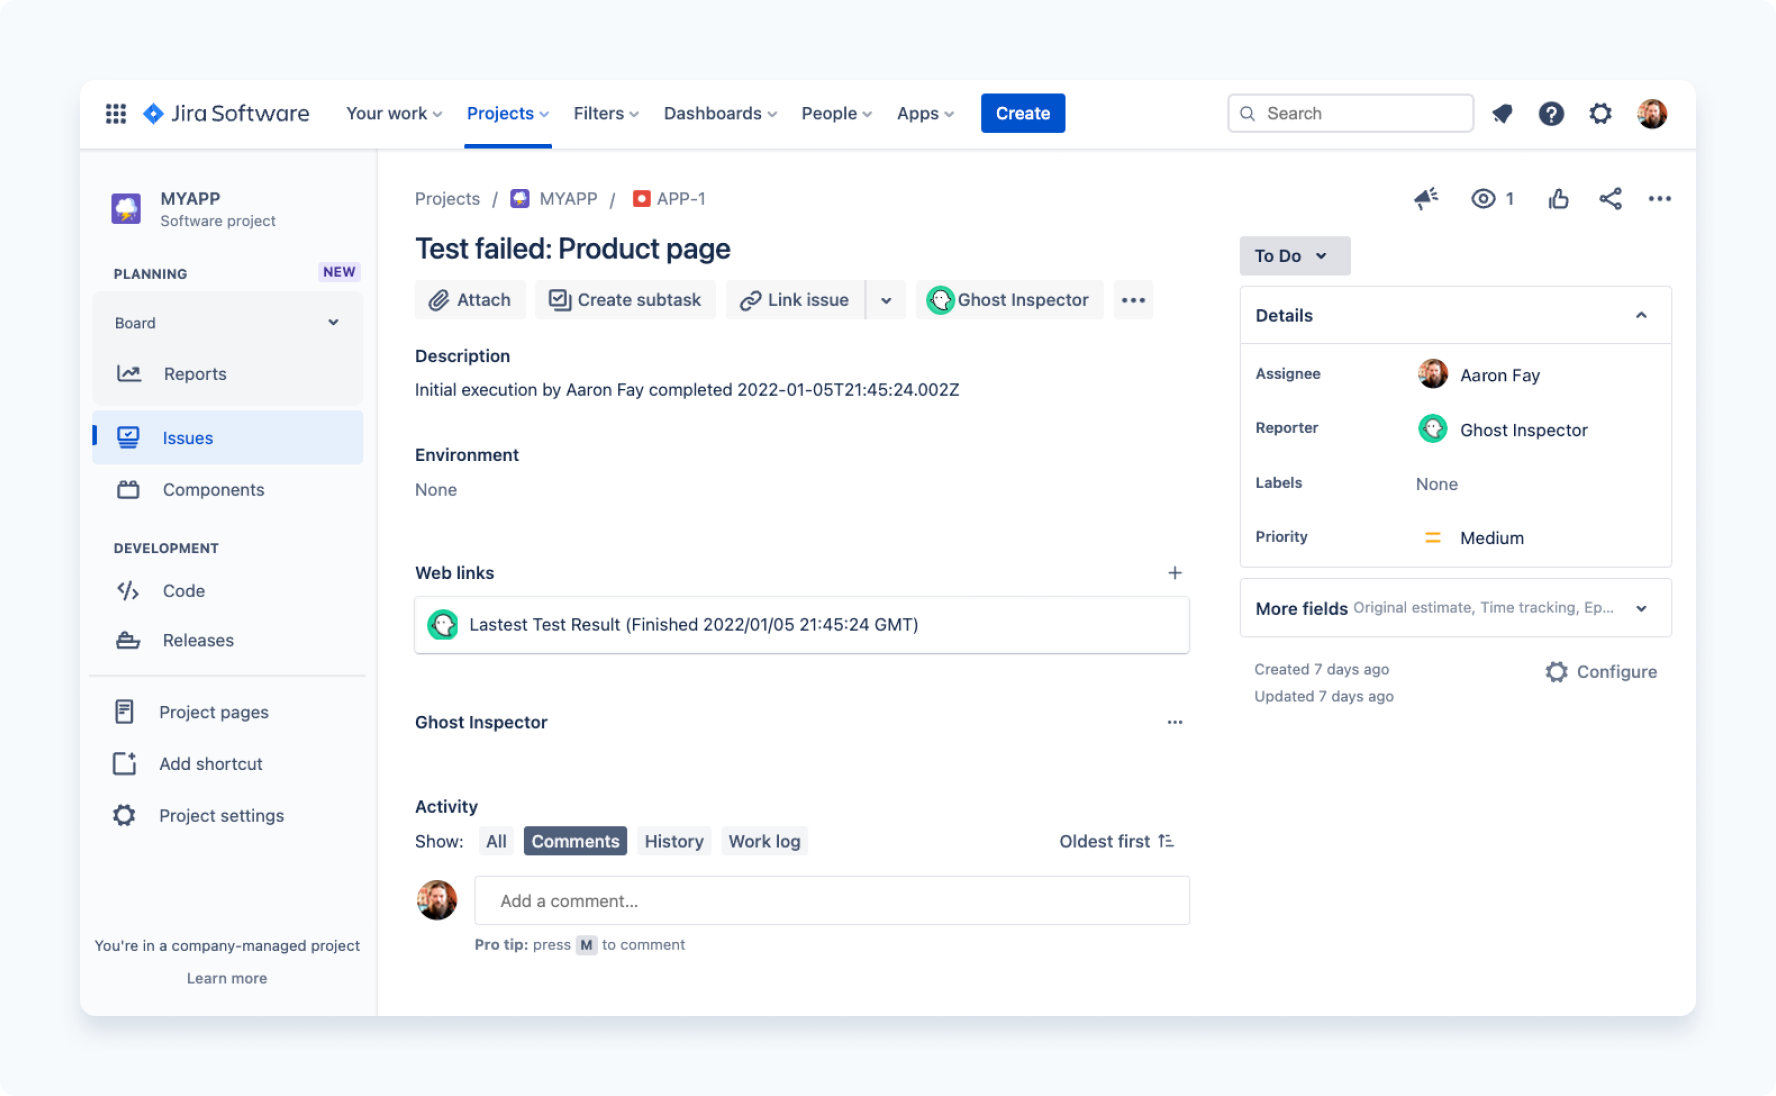
When a new issue is created in Jira from your failing Ghost Inspector test, the test ID will automatically be associated to the created issue using the custom field Ghost Inspector Test ID. The Jira issue will also be updated with the name of the user and date of completion for the original result that created the issue. A remote link will also be created that links to the most recent result:
Executing a test within Jira
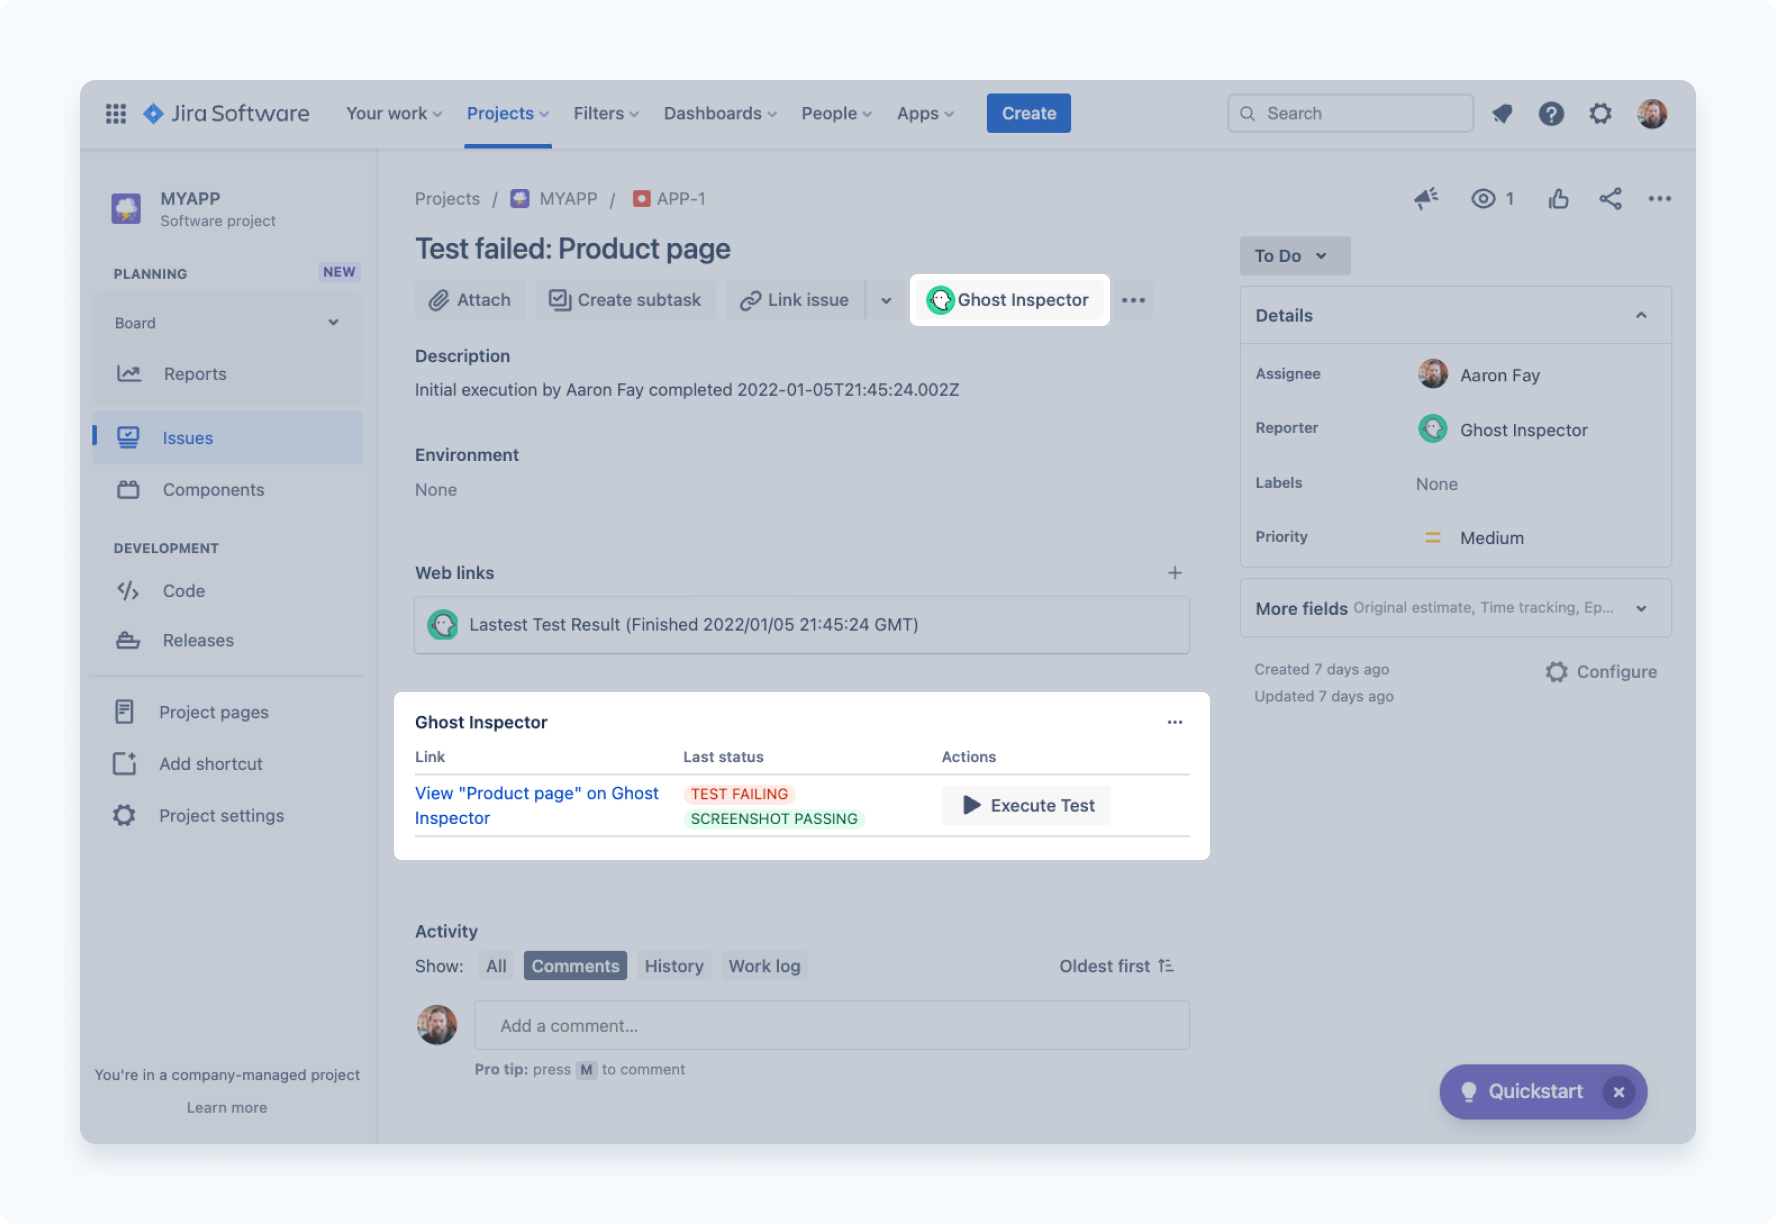
With the Ghost Inspector plugin installed in your Jira account, you will now see a new issue action button available on your issues. Clicking the button will open a custom panel on your issue that shows the current status of the linked Ghost Inspector test, as well as a button that will allow you to re-execute that test from within Jira:
Display custom Test ID field
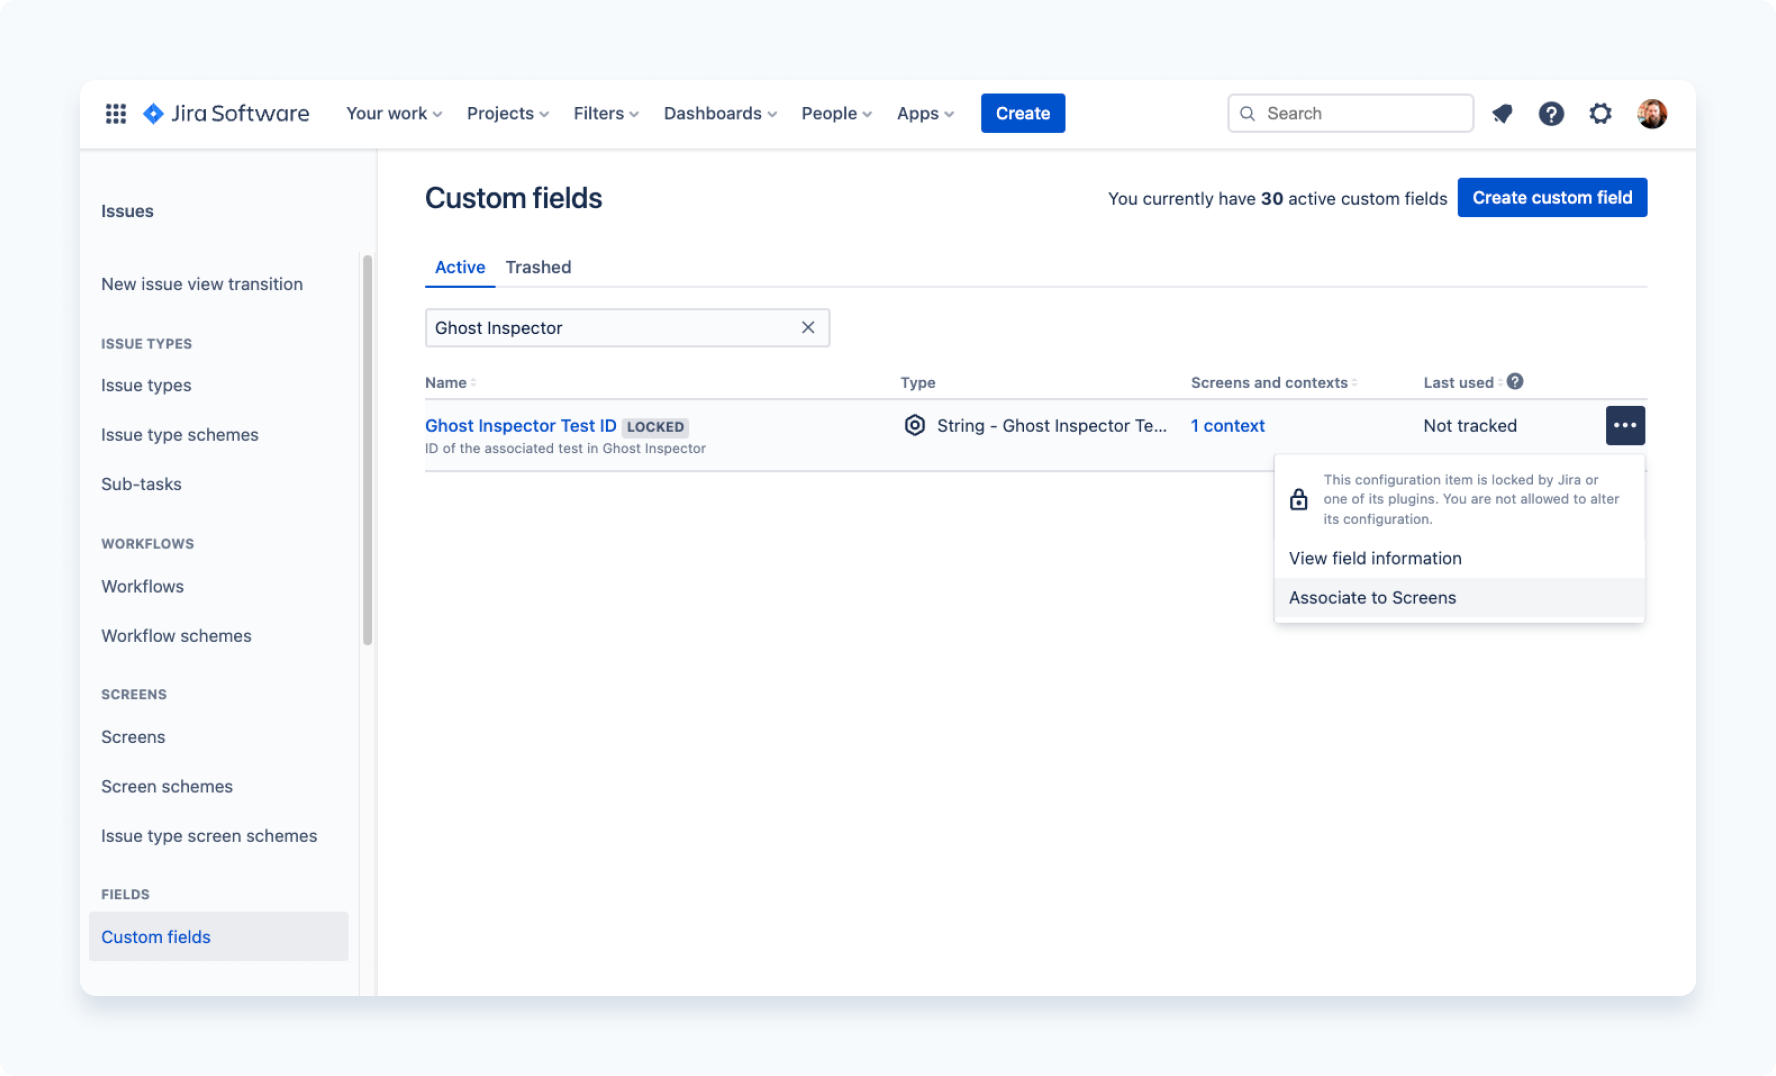
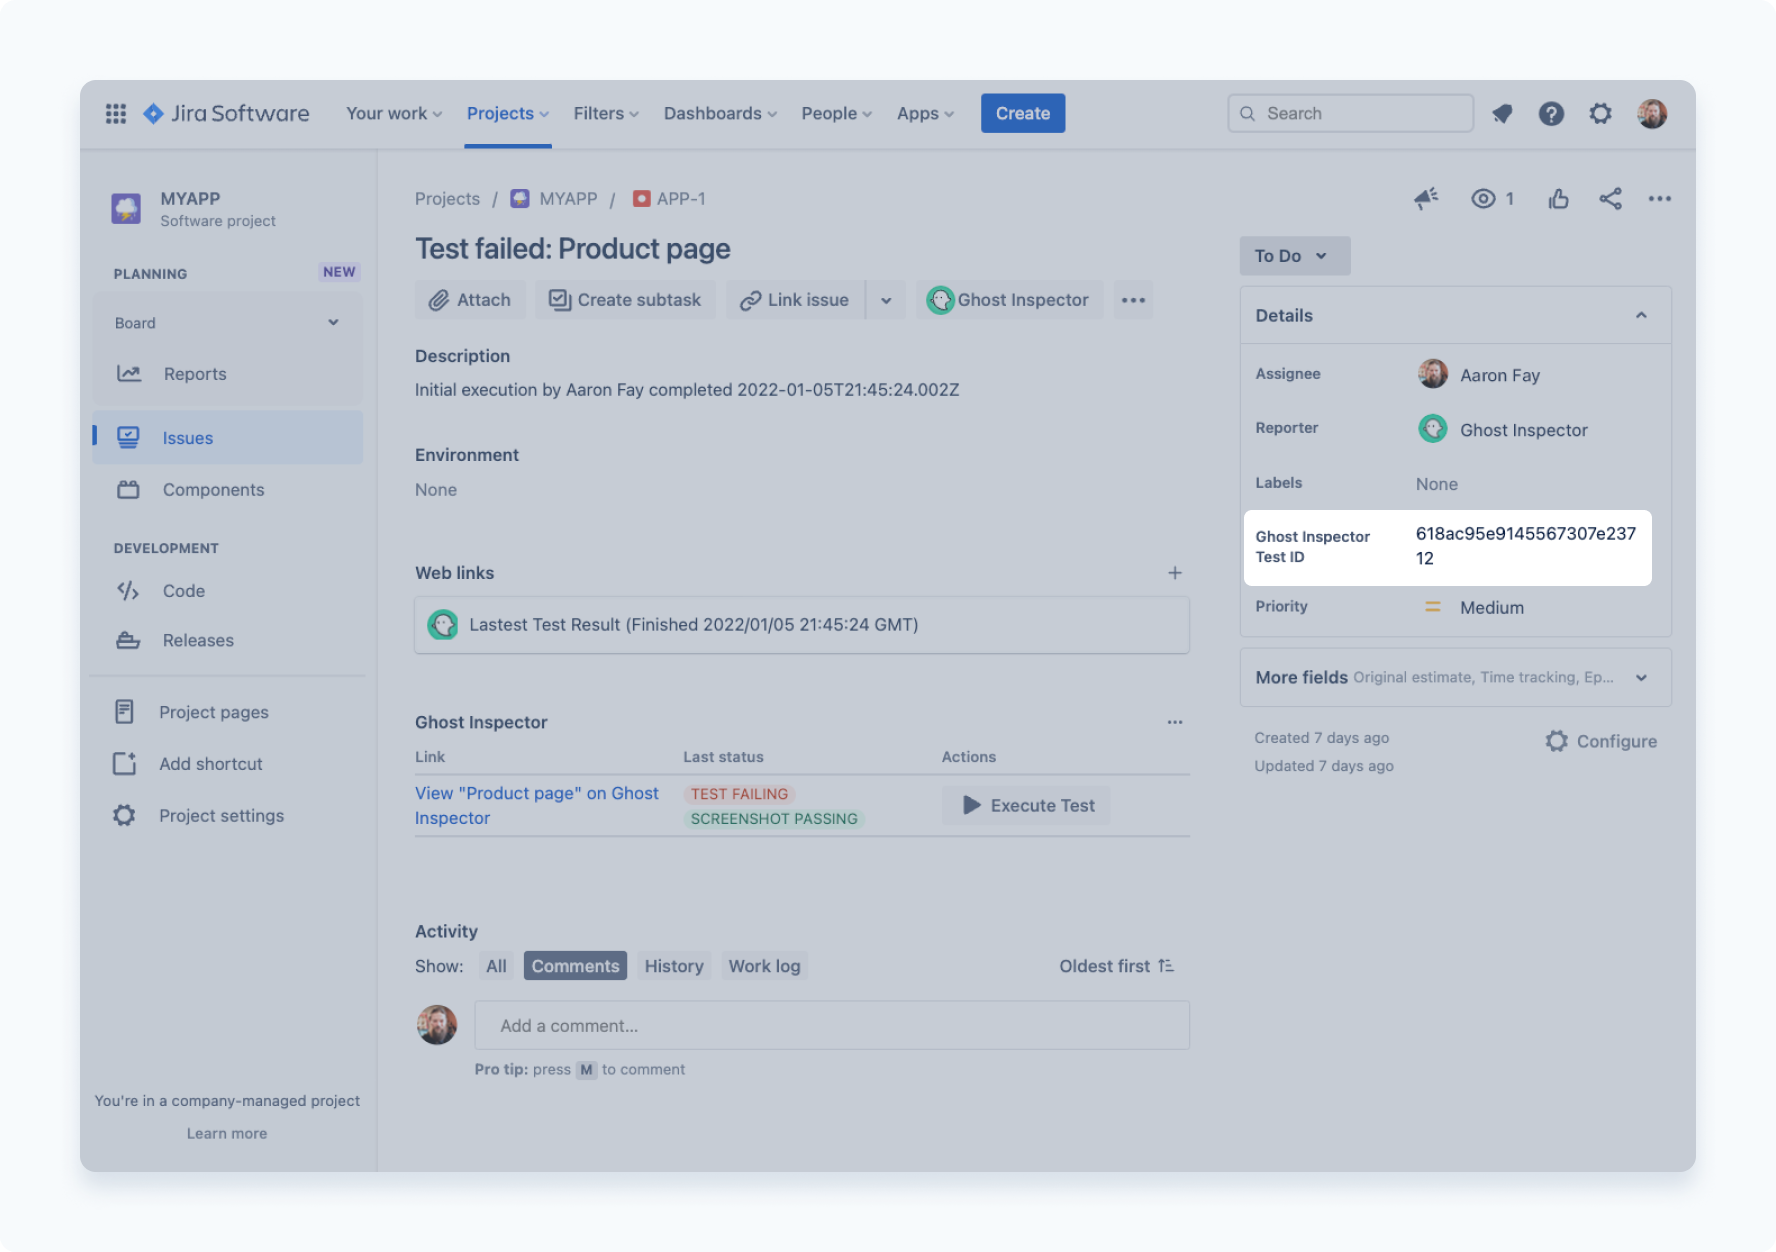
By default the custom field Ghost Inspector Test ID may not be displayed on your issue. You can add the custom field by navigating to Settings > Issues > Custom Fields and searching for "Ghost Inspector". Click the three dots (...) to the right of the field and click Associate to Screens:
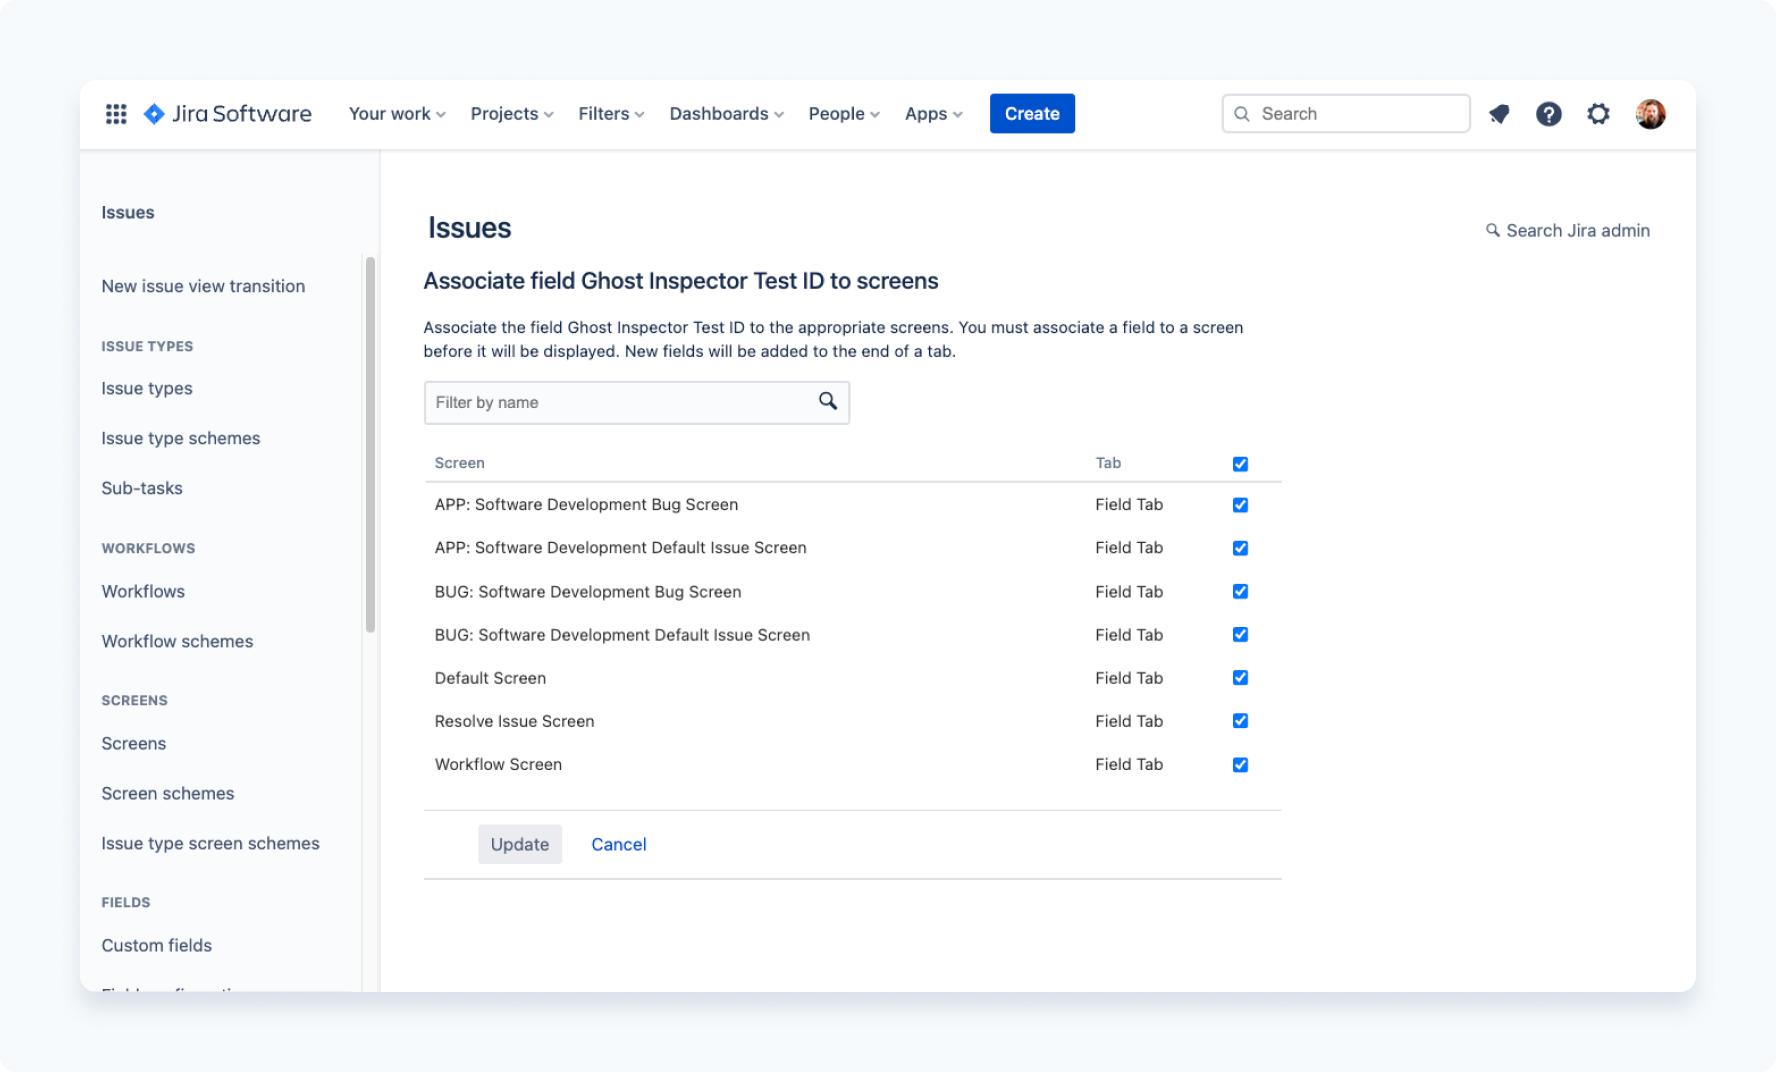
Select the screens you would like to see the custom field on and click Update.
The custom field Ghost Inspector Test ID will now be visible on the issue within the right panel:
Manual webhook customization
All of the fields that are configured on your webhook can be customized either on the webhook itself as query string parameters, or within your test as variables:
| Variable name | Context | Description |
|---|---|---|
jiraProjectKey | Create issue | Specifies the Jira project where new issues will be created. |
jiraAssignee | Create issue | Specifies the Jira user issues will be assiged to when the issue is created. |
jiraIssueKey | Update issue | Specifies the Jira issue this execution will update. |
jiraStatusOnPassing | Update issue | Specifies the Jira issue status to transition to on test passing. |
jiraStatusOnFailing | Update issue | Specifies the Jira issue status to transition to on test failure. |
jiraTransitionField | Create issue Update issue | Specifies which field on the test will create/update a Jira issue. Options are test, screenshot or both. |
Run test w/custom settings example
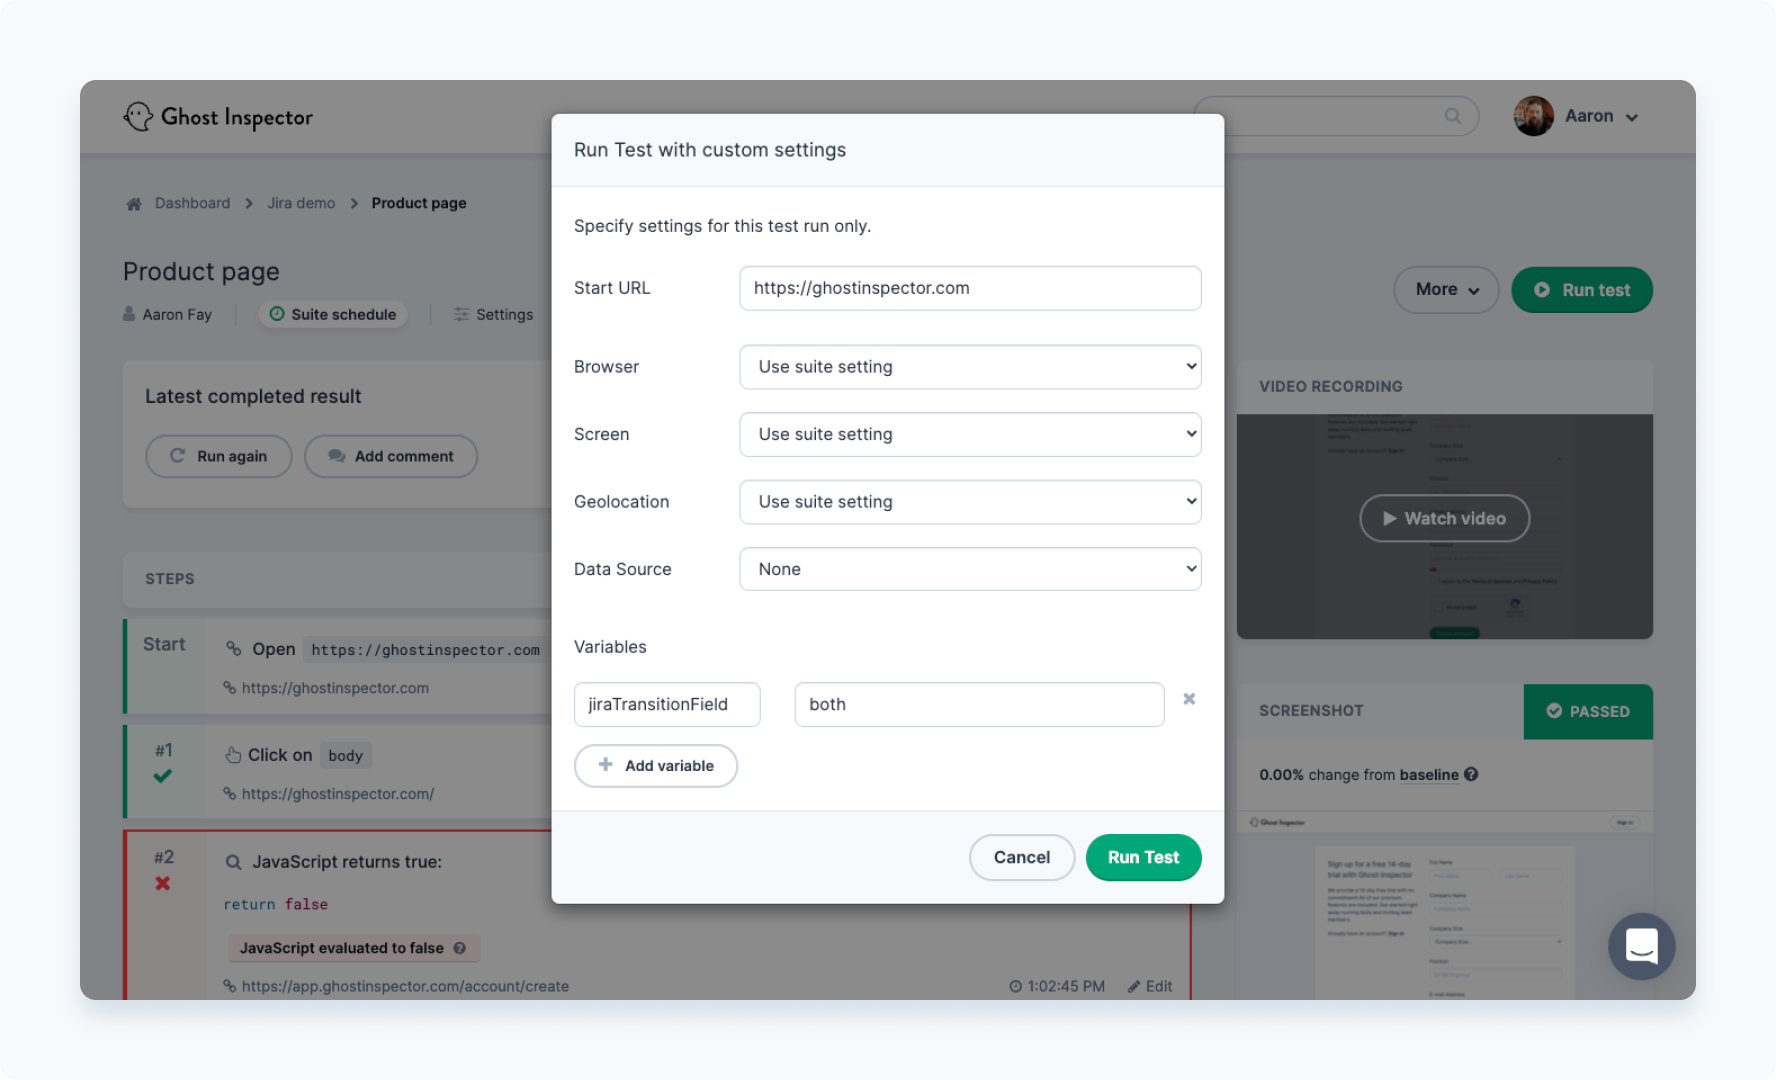
Jira webhook variable customizations can be made within the Run test w/custom settings dialog:
Webhook variable example
Here is an example of a webhook URL using custom parameters:
https://a1b2c3d4-abcd-9876-3546-c043ac7cfde3.hello.atlassian-dev.net/x1/iLHet6ZqoXP5OR1SMShfKuA3gx4?id=1234567&jiraProjectKey=GHOST&jiraTransitionField=screenshot