Web Test Recorder
Your Ghost Inspector account includes an extension for recording and saving automated tests right in your browser. This allows you to record and play browser tests quickly and easy, with the option to jump into our codeless test editor afterwards for more advanced functionality. The test recording extension is available for Chrome and Firefox.
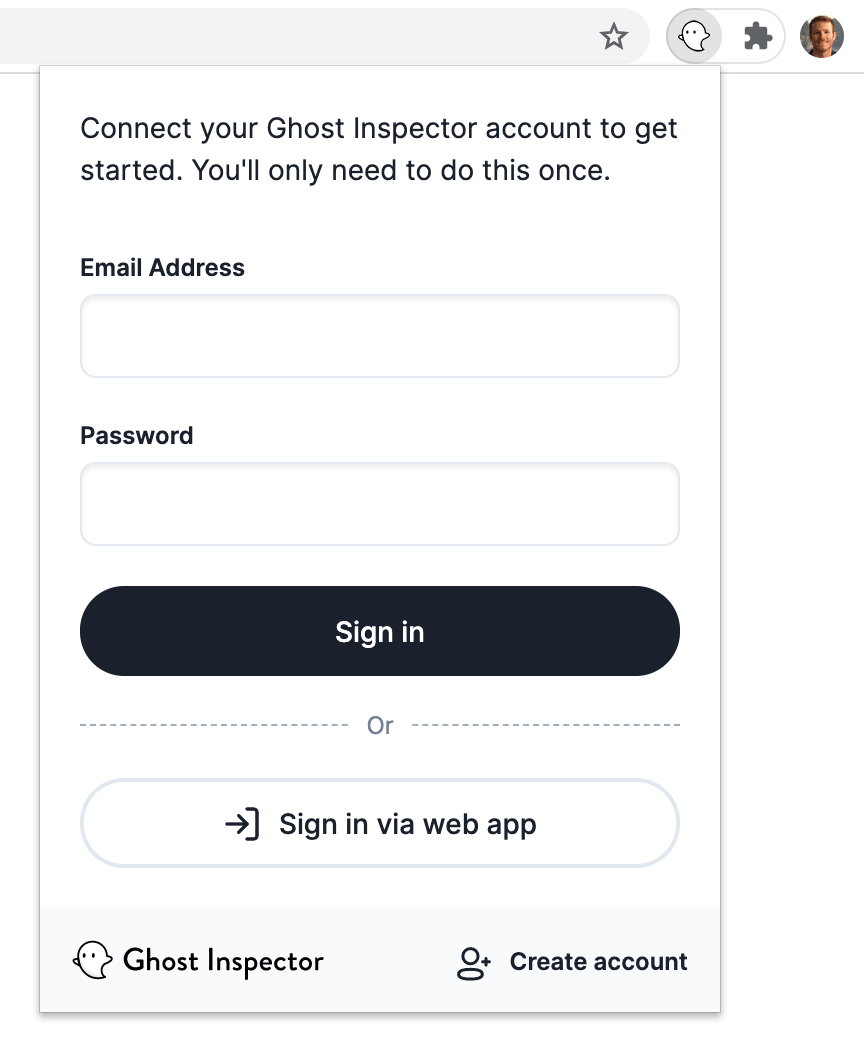
After installing the extension, a Ghost Inspector icon will appear in your toolbar. Clicking this icon will present you with the Ghost Inspector recording tool. You will need to log into your Ghost Inspector account the first time you access the tool.
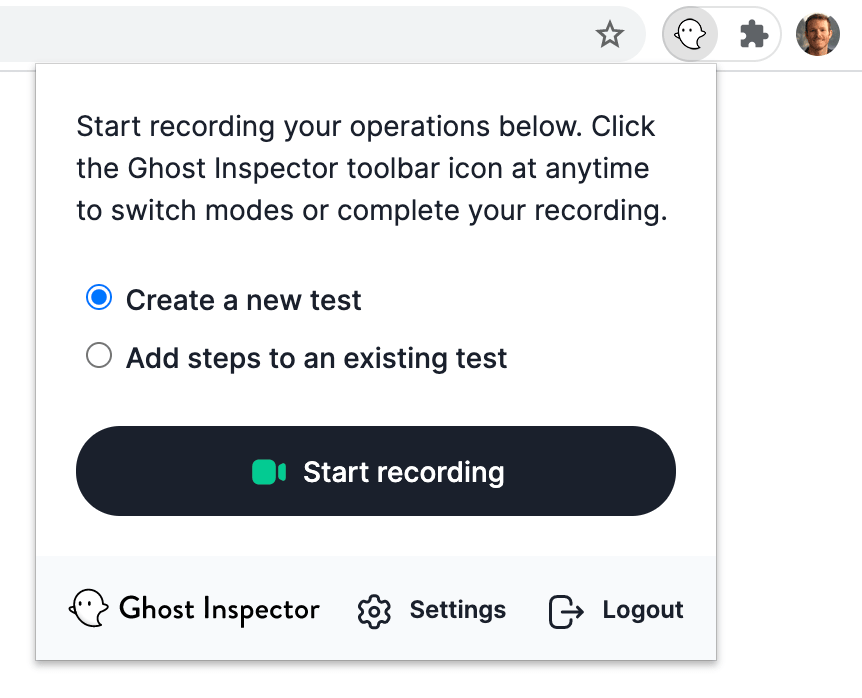
After logging in, you will then be presented with a button to "Start recording". The extension works by recording the actions you perform in the browser, such as clicking and filling in forms, so that those actions can be formed into a test and the same sequence can be re-run from the Ghost Inspector service. Once you click “Start recording” the extension will begin recording your actions. The recording is completely transparent, but Ghost Inspector’s toolbar icon will turn green when recording is underway.
In addition to recording actions, the extension can also record “Assertions”. Assertion are confirmations that something is true. For example, you might assert that an element exists on the page or contains specific text. They are helpful to verify that your test is working as it should and control its flow. During the recording process, you can switch from recording actions to recording assertions by clicking the Ghost Inspector toolbar icon and the “Make assertions” button.
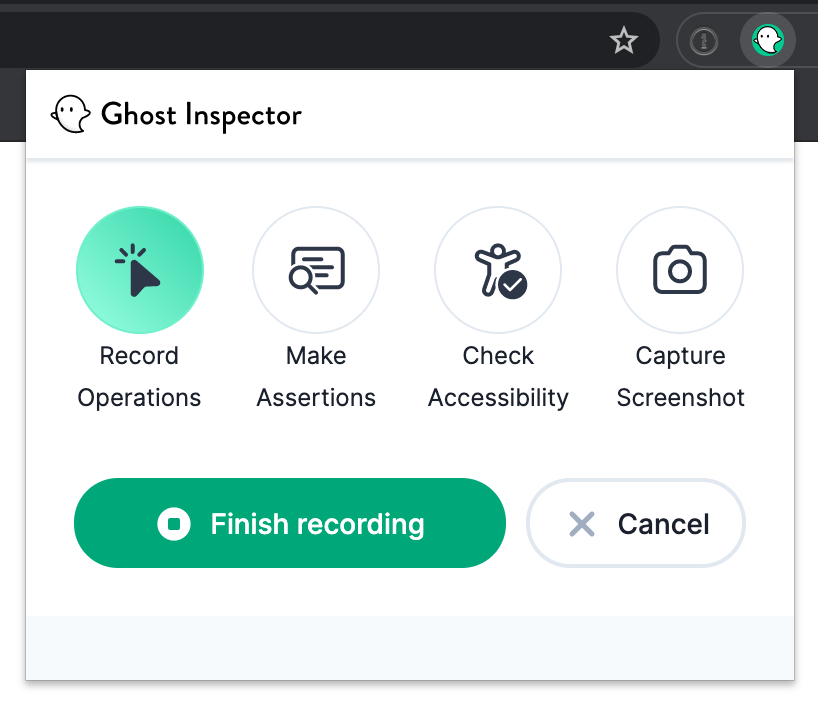
When recording assertions, the extension will attempt to disable any actions associated with elements so that you can assert things like links and buttons without triggering their associated actions. You'll see the extension displays a crosshair cursor and highlights elements as you hover over them so you can tell what you're asserting. The extension will use internal logic to decide whether to assert that the element you've clicked exists, or whether to assert its text contents. These assertions can be adjusted in the test editor after recording is complete.
You can flip back and forth between recording actions and assertions at any point during the recording process. There is also a small link to cancel the recording and start over.
Once you're done recording, click the “Done” button. You'll be presented with a form for saving the test. You will need to name the test and select which of your suites to store it in. You can also enable or disable our visual testing screenshot comparison for the test.
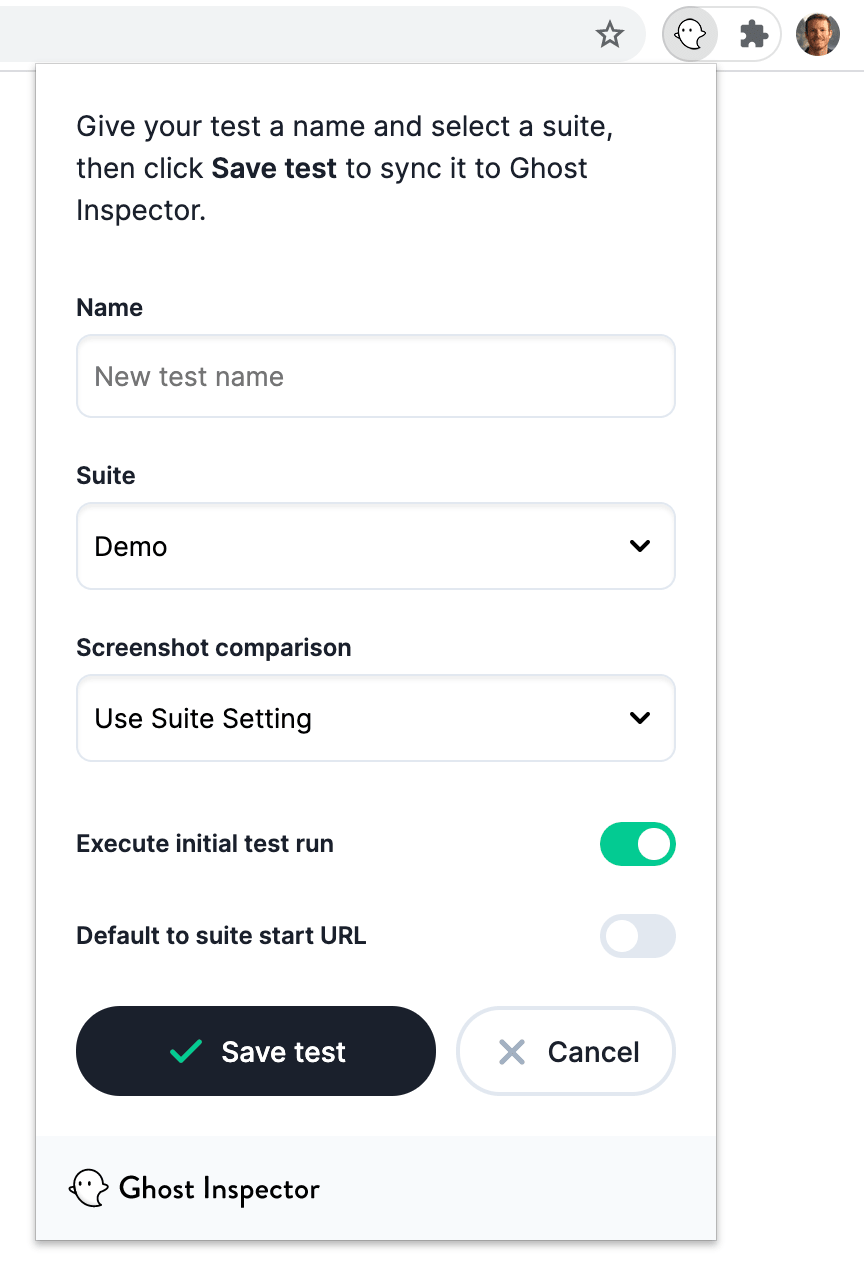
Once you save the recording, you’ll be presented with a link to the new test in the hosted Ghost Inspector application. The test will go through an inital test run, retracing your actions in a web browser operated by our automated service. Once the initial test run completes, you can edit the steps and adjust the test’s settings.
Recorder Settings
The recorder’s settings can be accessed by clicking the gear icon near the top, right in the extension popup.
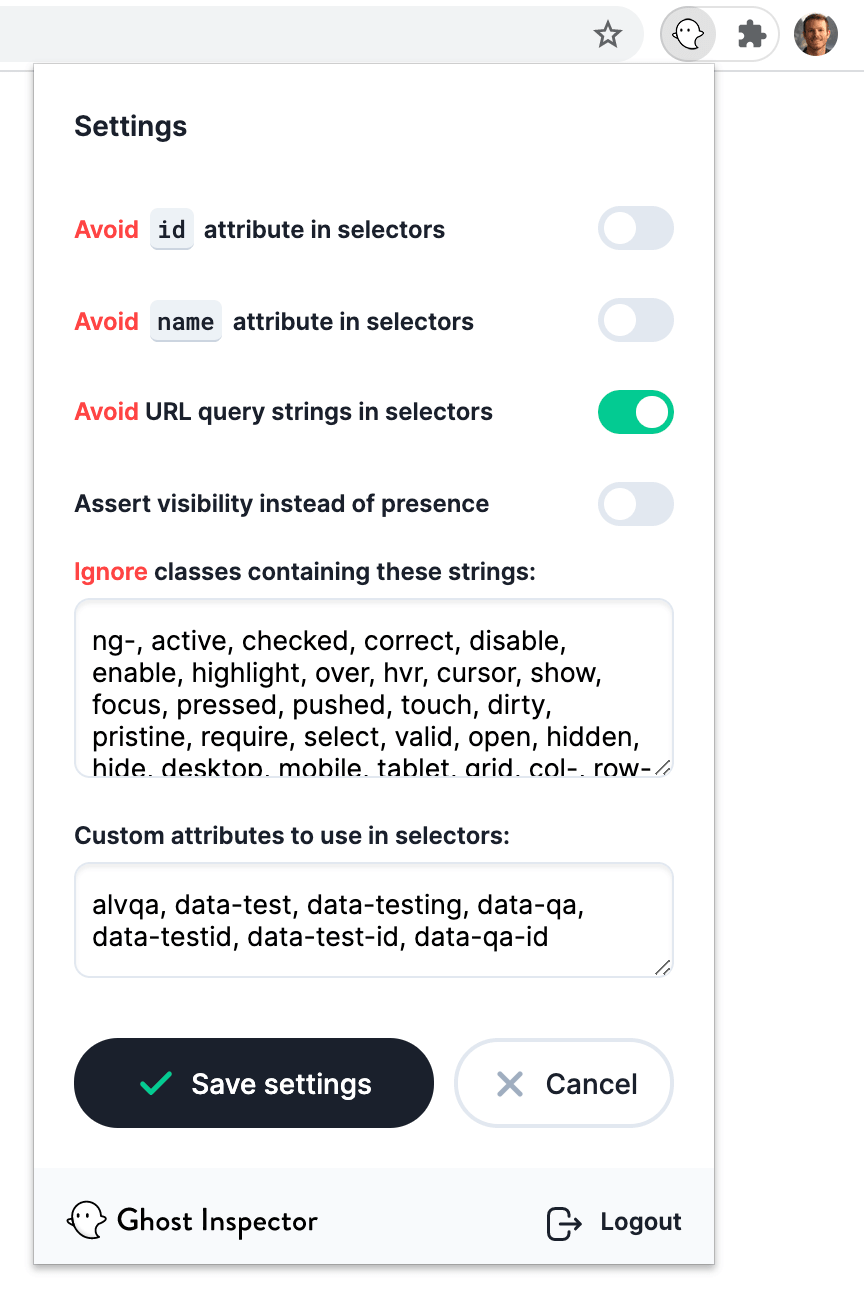
There are a number of options to prevent the recording of certain attributes or class names. If you have an application that uses dynamic ID or name attibutes, there are two different options available:
Option 1
CSS allows for some wildcard-ish selectors. Although, you can't use regular expressions, you may still be able to accomplish what you’re trying to do by editing the selectors in your test with the test editor after recording.
Option 2
Alternately, you can update the recorder's settings to avoid matching by ID or name attribute. If you update your settings to avoid using the ID attribute in the selector and re-record your test, it’ll use the other selector methods to match the elements.
Using the Extension with Site Access Restrictions
If your organization restricts browser extension access to specific sites, you can still use our Chrome extension by adding the following URL to your allowed list:
https://api.ghostinspector.comThis domain is required for the extension to function properly.