Login IP Allowlist
Table of Contents
- Overview
- How it works
- Enabling the allowlist
- Adding addresses and ranges
- Common scenarios
- Avoiding lockouts
- Related
Overview
The login IP allowlist lets you restrict who can access your Ghost Inspector organization based on their network location. When the allowlist is enabled, members can only sign in from the IP addresses and ranges you specify — for example, your office network or corporate VPN. Requests from any other address are blocked.
This adds a network-level layer of protection on top of authentication: even with valid credentials, a member must also be on a trusted network to gain access.
The IP allowlist is configured per organization and is available on enterprise plans. It is managed from your organization settings by an organization administrator.
How it works
- When the allowlist is disabled, members can sign in from any location (the default).
- When the allowlist is enabled, only requests originating from an address that matches an entry in the list are allowed. All other requests are denied.
- The allowlist applies to access to your organization's data, so it governs members across your team — not just your own session.
Before you enable the allowlist, make sure your own current IP address is included. Otherwise you could lock yourself out of the organization. The settings page shows your current IP address to make this easy.
Enabling the allowlist
- Open your organization settings and go to the Login IP Allowlist page.
- Add at least one entry that covers your current network (your current IP address is displayed on the page for reference).
- Check the box to enable the IP allowlist.
- Save your changes.
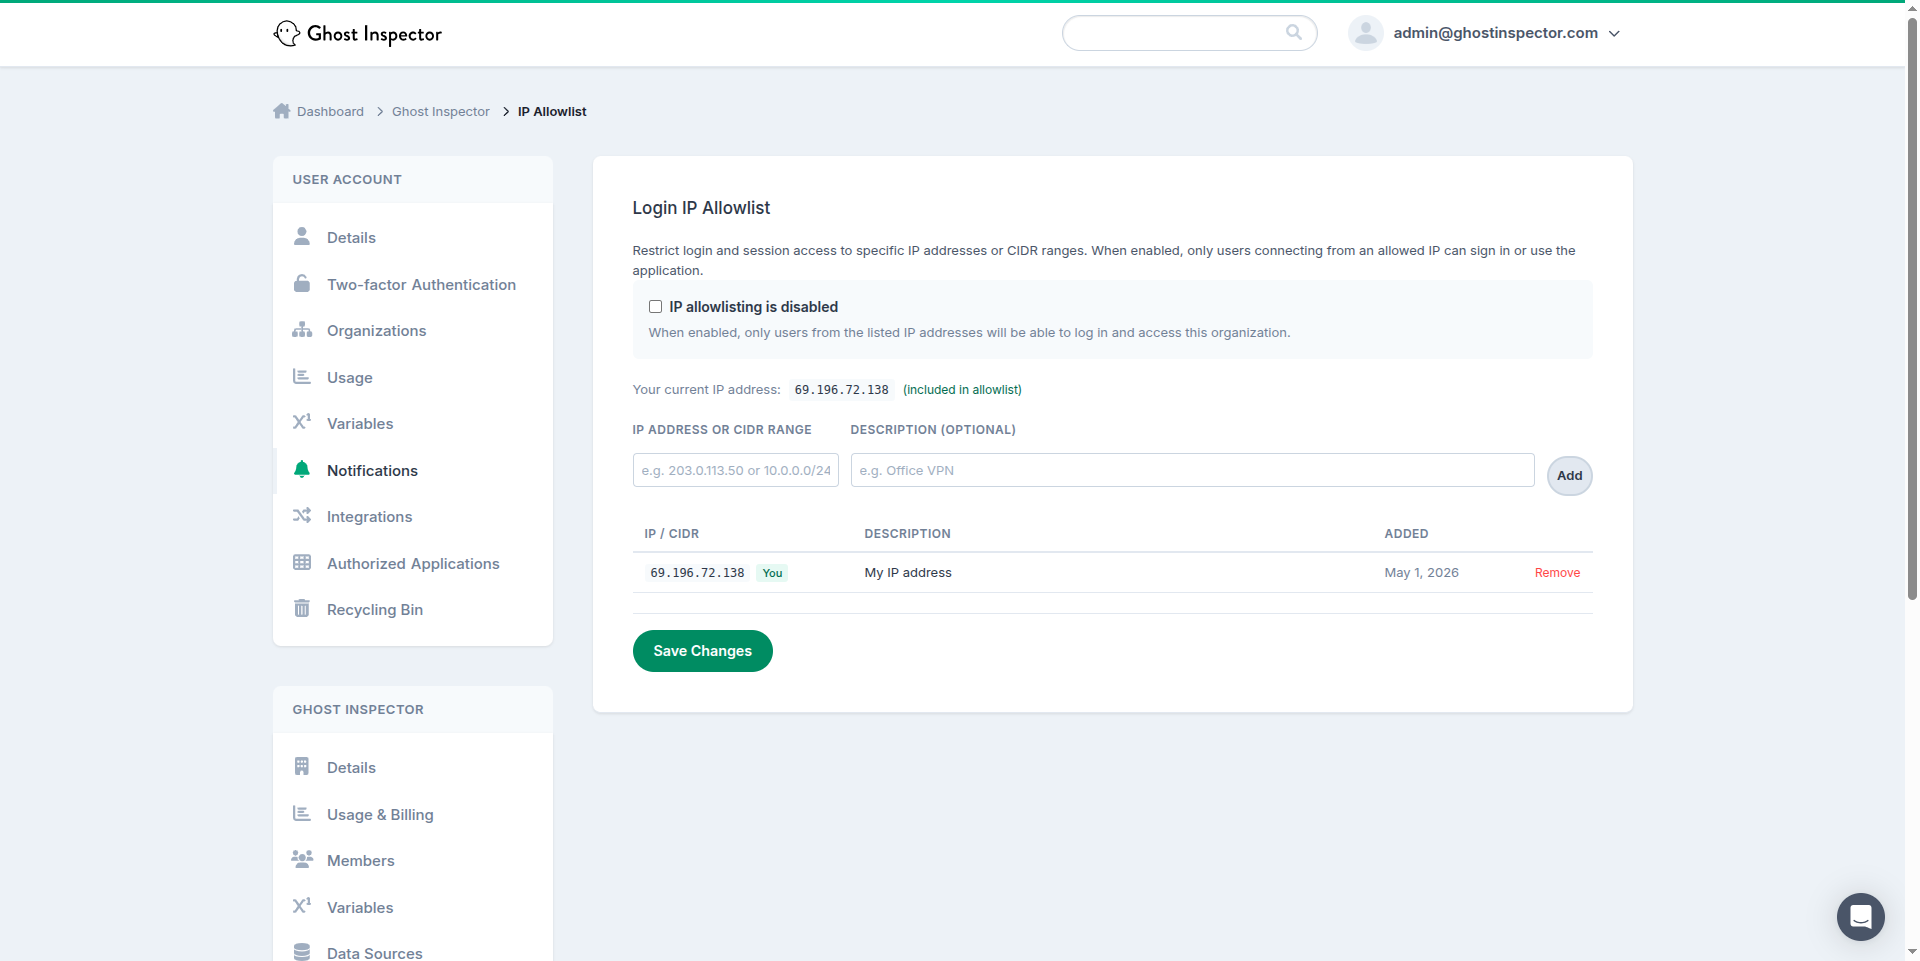
Adding addresses and ranges
You can add entries as either a single IP address or a network range in CIDR notation:
- Single address — for example,
203.0.113.42. Use this for a fixed office or VPN exit IP. - CIDR range — for example,
203.0.113.0/24. Use this to cover a block of addresses, such as an entire office subnet.
Add each address or range you want to trust. To stop trusting a network, remove its entry from the list using the Remove action next to it.
If your office or VPN uses a dynamic IP that changes periodically, prefer adding the provider's CIDR range rather than a single address, so members aren't unexpectedly blocked when the address rotates.
Common scenarios
- Office only — add your office's public IP address or subnet so the organization can only be accessed on-site.
- VPN required — add your VPN's exit IP address(es) so members must connect through the VPN first.
- Multiple locations — add an entry for each office or trusted network; members on any listed network are allowed.
Avoiding lockouts
- Always confirm your current IP (shown on the settings page) is covered before enabling.
- When adding a VPN or office range, double-check the address with your network administrator.
- If you do get locked out — for instance, after a network change — contact your Ghost Inspector account representative or support for help restoring access.
Related
- Single sign-on (SSO) — authenticate members through your identity provider.
- SCIM provisioning — automatically manage membership from your IdP.
- Access events (audit log) — review sign-ins and blocked attempts.
- Test runner IP addresses — the IPs Ghost Inspector tests run from.